When inspecting a V-belt, pay attention to cracks in the rubber, especially on the inner surface of the belt, and to the fit of the belt in the grooves of the pulleys: a worn belt is usually deeply embedded in the groove, and its outer edges may be frayed.
It is important that the belt is properly tensioned. With a weak tension, the belt slips, which leads to its increased wear and inefficient operation of the units; Too much belt tension causes accelerated bearing wear.
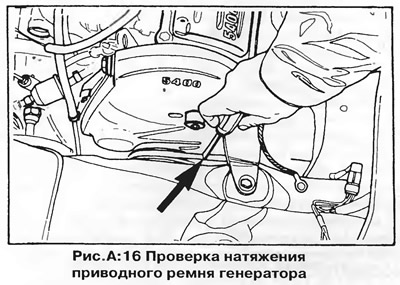
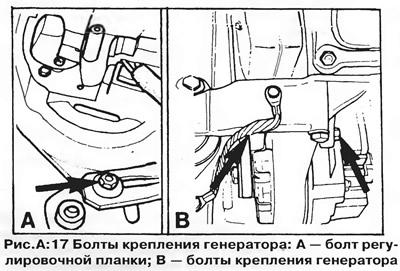
To check the tension of the belt, press the middle of its longest strand with your thumb (pic. A:16). The deflection of the belt should be approximately 10 mm. If it is necessary to tighten the belt, loosen the alternator mounting bolts (shown by arrows in fig. A:17), then push the alternator away from the engine by inserting the lever (hammer handle) between the alternator and the cylinder block, and tighten the bolts. Check belt tension and adjust again if necessary. Avoid pulling the belt too tight.


Replacement
Periodically check the condition of the belt and replace it if it is found to be split, torn, cracked, frayed or shows visible signs of wear.
To replace the belt, loosen the alternator mounting bolts, move the alternator to loosen the belt, and remove the belt from the pulleys. Install a new belt and adjust its tension. Let the engine run at high speed for 5 minutes, then check the belt tension. Do not try to pull the new belt over the pulleys with a lever without loosening the alternator mountings - this can damage the pulleys and belt.
NOTE: After installing a new belt, check and adjust the tension after driving 150-200 km to compensate for the stretch.

Visitor comments