Adjustment - engines 1.1 and 1.3 l
Check valve clearances with the engine warmed up to operating temperature.
Remove the valve cover by removing the six screws and two nuts. If the valve cover gasket is intact and seals, it does not need to be replaced.
To make it easier to turn the crankshaft of the engine, it is recommended to turn out the spark plugs.
You can check the clearances simultaneously on two valves of the same cylinder - for this, both valves must be closed, and their cams must be directed upwards. Turn the engine so that the valve cams of the cylinder on which the clearance is measured are directed with the protruding parts upwards. Crank the engine by the crankshaft pulley bolt - DO NOT use the camshaft sprocket bolt for this purpose, otherwise the timing belt will stretch.
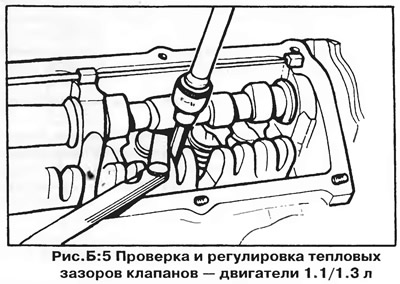
Measure the clearance between the cam and the valve lever as shown in fig. B:5. The required clearance is indicated in section "Technical data". The intake and exhaust valves are located alternately, the intake valves are closer to the timing belt.

The gaps are set using a flat feeler gauge of appropriate thickness. If the gap is correct, the feeler gauge should fit snugly into the gap between the cam and the valve lever, but still move easily.
To adjust the clearance, turn the valve lever adjusting support bolt with a hex wrench (collar). The bolt has a spherical head with an internal hexagon socket.
Adjust the remaining valve clearances in the same way. Turn the crankshaft only in the direction of normal rotation - clockwise, when viewed from the side of the pulley.
After completing the adjustment, reinstall the valve cover, screw in the spark plugs and connect the wires.
NOTE: If the valves are adjusted with the cylinder head removed from the engine (e.g. after replacing or lapping valves) then you should set the clearance values specified for a cold engine (see section "Technical data"). In this case, the valve clearances should be checked after 1000 km of run.

Visitor comments