Adjustment
Clutch cable adjustment is described in chapter "Vehicle maintenance work’'.
Replacement
A sign of damage (fraying) cable inside its shell, as well as a sign of lack of lubrication is the clutch cable jamming during operation or the pedal not returning to its original position. If cleaning and lubricating the cable does not solve the problem, replace the cable.
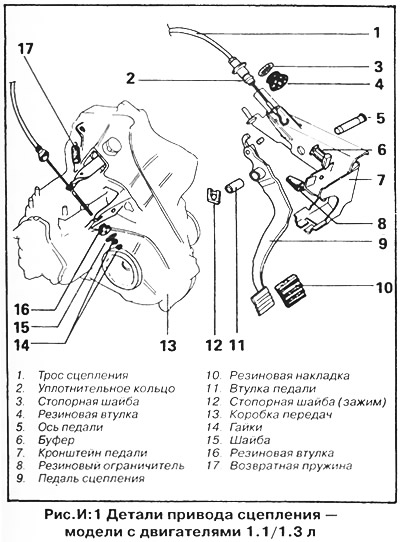
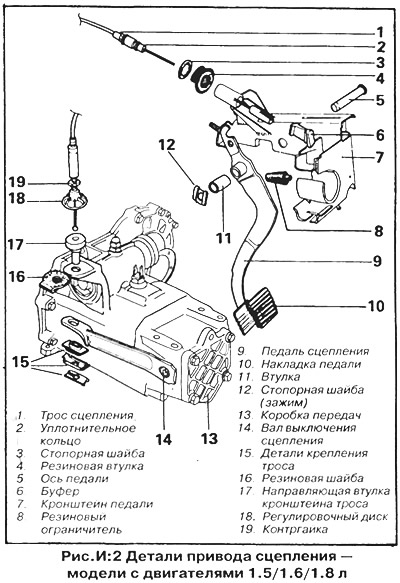
1. Loosen the cable adjusting nut on the transmission side and disconnect the cable and its sheath from the clutch release lever and from the bracket on the gearbox housing (pic. I:1, I:2). Attach the cable attachment parts to the arm and bracket.


2. Separate the other end of the cable from the top of the clutch pedal lever (inside the car). On some models, the cable is attached to the pedal with a finger - to release the end of the cable, you need to push the finger. Pull the cable towards the engine compartment.
3. Lubricate the new cable with grease before installation. Install the cable in the reverse order of removal. Make sure that the O-ring, rubber bushing and cable lock washer are properly installed on the baffle.
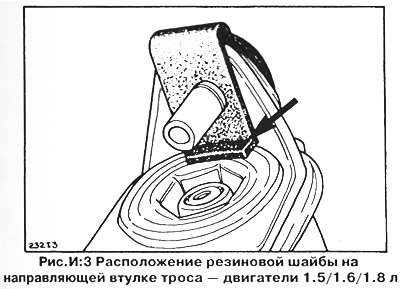
4. On vehicles with a 1.5/1.6/1.8L engine, make sure that the rubber washer located on the guide bushing of the cable bracket on the gearbox housing is installed correctly - see fig. I:3. If installed incorrectly, the lip of the washer may block the transmission breather hole, resulting in oil leakage due to lack of ventilation.

5. Adjust clutch cable (see chapter "Vehicle maintenance work").

Visitor comments