1. The gearbox is removed downwards, while the car must be raised above the ground high enough so that the gearbox can be removed from under it. It is best to do this work on the pit, but it is also possible to raise the car and set it on appropriate stands. It is necessary to pay attention to the fact that for easier disconnection of the drive axle shafts, the wheels must be rotated. You do not need to raise the car very high, as some actions must be done from above. The required clearance should be 600 mm.
2. Since the engine remains in the car without support from the rear, a temporary suspension must be made to accept its mass. This will be easy if a block and associated rigging or a garage winch is available, and if not, then a simple crossbeam-shaped suspension supported on the engine chamber trough is possible. It is also possible to support the engine from below with blocks placed under the oil sump, but then the car must not be moved after removing the gearbox.
3. Remove the engine cover as described in Section 11 and place it carefully next to it.
4. After supporting the engine, disconnect the ground wire from the battery.
5. This section defines "front" (front end) gearbox refers to the part that is bolted directly to the engine. Definition "left" And "right" the side indicates the sides that we observe when standing from the side of the car's engine behind the gearbox, see towards the engine.
6. Remove entire left transmission mount bracket and set aside. Drain the oil from the gearbox.
7. Disconnect the clutch cable from the gearbox.
8. Disconnect the wire to ground attached to the gearbox bracket.
9. Unscrew and remove the starter.
10. Disconnect the reverse light wire from the gearbox.
11. Disconnect the speedometer cable from the gearbox by unscrewing the fastening collar.
12. Unscrew and remove the upper fixing screws connecting the gearbox to the engine.
13. Disconnect the inner ends of the drive shafts from the flanges near the gearbox as described in section 7, and then tie them up so that they do not interfere.
14. Unscrew and remove the rear cover from the clutch housing.
15. Unscrew and remove the remaining bolts connecting the engine to the gearbox, paying attention to the position of the rear mounting bracket.
16. Unscrew the rear bracket nut and remove the bracket.
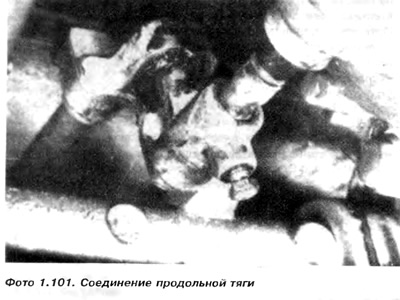
17. To turn out a bolt from a longitudinal lever of the lever of a choice of transfers and to remove a connector from the lever. The thread of the bolt is coated with a liquid that prevents it from turning out. If necessary, remove the plastic ball from its seat and turn the connector on the longitudinal lever.

18. Support the gearbox on a mobile jack (ski lift) (if available).
19. Then you need to check if anything else is holding the box, and think about how it will be lowered. In addition to the guide pins of the gearbox, also the splines of the input shaft (clutch) geared with the clutch disc. The box must then be moved away from the engine in order to be able to remove the shaft from the clutch hub. This operation must be carried out carefully, as otherwise the clutch disc or booster may be damaged. If the box is driven unevenly, then the shaft will be clamped in the splines.
20. Do not try to disconnect the engine box by driving a wedge between the engine and the clutch housing, as this will cause the housing to break. When disconnecting the box, care must be taken that the box does not sink to the ground. Therefore, the help of a second person is needed. The box must be moved slowly away from the engine until it can be lowered and removed from under the car.
21. Assembly is carried out in the reverse order of disassembly. First you need to lightly grease the splines of the input shaft with grease and make sure that the rear tin plate of the engine is correctly installed on the fixing studs. It is not necessary to fully tighten the mounting bolts and nuts until the gearbox rests on the brackets. adjust (how much is needed) gear selection mechanism.
22. Adjust the clutch as described in section 5, and then check if the gear selection mechanism works correctly. Fill the gearbox with oil.

Visitor comments