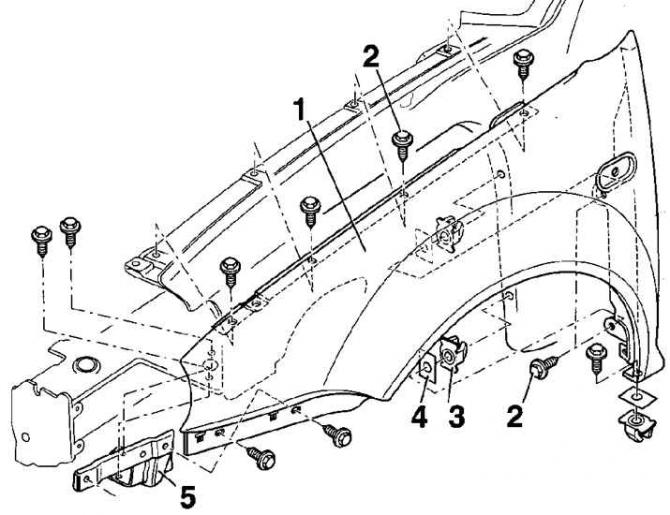
Fastening elements of the front wing

- 1 - front wing;
- 2 - bolts 9 pcs.;
- 3 - spring nut holder;
- 4 - seal;
- 5 - bracket
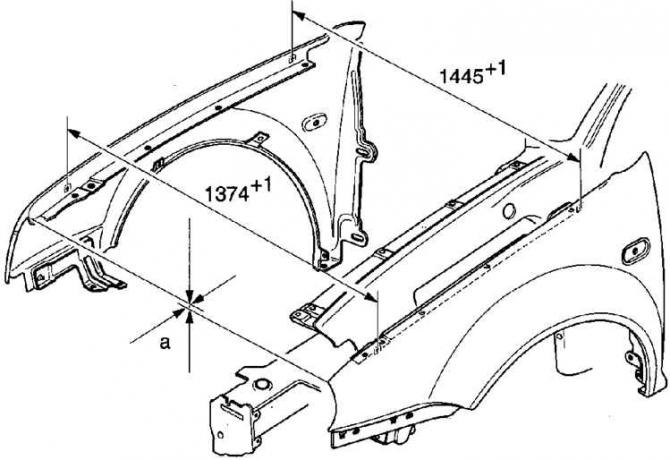
The distance between the upper parts of the front wings and the relative position between the wings in the horizontal and vertical planes

- a = 2 mm
Removing
1. Remove the front bumper and bumper beam.
2. Remove the front wing niche trim.
3. Remove the side turn signal.
4. Remove 9 bolts securing fender (2, see fig. Fastening elements of the front wing).
Warning: To prevent damage to the paintwork, apply duct tape around the fender mounting screws.
5. The fender is mounted on a layer of protective mastic, so to separate the fender from the body, soften the protective mastic with a hair dryer.
6. Put a flat nozzle on the hair dryer and, gradually warming up the mastic, remove the wing.
Installation
1. Before installing the fender in place, clean the mating surface and apply zinc paste to the fender mounting points on the wheel arch and A-pillar. This paste is used as an anti-corrosion protection.
2. Install the front fender to the vehicle, align the bolt holes and tighten the fender mounting bolts.
3. When installing the wing, check that the gaps between the wing and the hood, as well as between the wing and the front door, are uniform along the entire length.
4. Install the front fender recess trim.
5. Install the bumper beam and front bumper.

Visitor comments