Removing
1. Disconnect the battery.
2. Remove an upholstery of a door.
3. Disconnect the plugs of the heater and rear window cleaner, as well as the additional brake light, central locking and disconnect the washer fluid supply hose.
4. Remove the electrical wiring and hose from the door cavity.
Attention! To facilitate subsequent installation, it is recommended to tie twine to the wires and hose, which will remain in the door cavity.
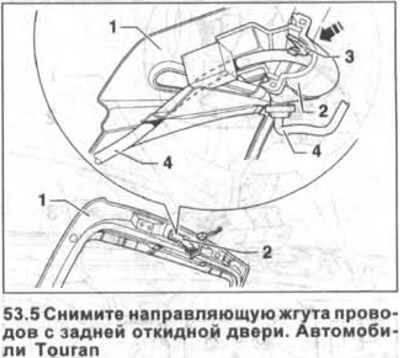
5. Touran cars. Remove the wire harness guide from the tailgate 1 (see illustration). To do this, press the lever 3 inside the rubber bushing 2 (see arrow in illustration), remove the guide and remove wires 4 from the door cavity.
6. Mark with a marker to facilitate subsequent installation the mounting position of the hinges 4 on the rear door 1 (see illustration).
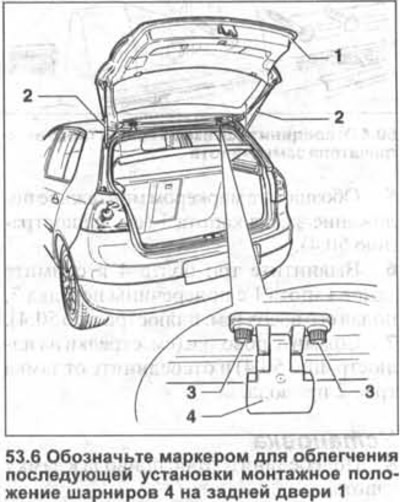
7. Loosen on both sides of the door two bolts 3 fastening the hinges to the door (see illustration 53.6). Do not completely unscrew the bolts.
8. Ask an assistant to support the door and remove both gas-filled stops 2 doors (see illustration 53.6).
9. You screw the bolts 3 and, acting together with an assistant, remove the tailgate 1 (see illustration 53.6).
Installation
10. Install the door on the hinges. When installing the old door, follow the marks made before removal.
11. Screw in by hand the bolts 3 of the right and left hinges (see illustration 53.6).
12. Reinstall both rear door gas struts.
13. Close the rear door and check the width of the gaps between the door and adjacent body parts.
14. Tighten the bolts 3 fastening the tailgate hinges with a force of 10 Nm.
15. Touran cars. Attach the wire harness guide to the door.
16. Pull the washer hose and electrical wires into the door cavity using string. If a new door is being installed, lay the hose and wires correctly in it.
17. Connect the washer hose and power plugs.
18. Reinstall the door upholstery.
19. Connect the battery.
Check and fit
Attention! To fit the door, the car must be on wheels.
20. Remove facing of a back crossbar.
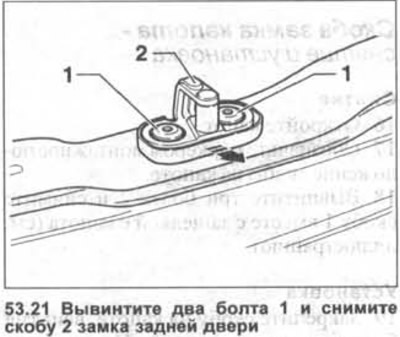
21. Unscrew two bolts 1 and remove bracket 2 of the rear door lock (see illustration).
22. Remove both gas-filled door stops.
23. Close the tailgate and check the width and clearance of the gaps between the door and adjacent body parts. The door is installed correctly if the gaps are the same in the closed position, and the door does not protrude outward or lie inward.
Gap width. Golf Cars:
- The gap between the rear door and the side parts of the body - 4.0±0.5 mm
Gap width. Touran vehicles:
- The gap between the rear door and the side parts of the body - 4.0 + 1 mm
- The gap between the rear door and the roof - 4.5 + 1 mm
24. If necessary, open the door, loosen bolts 3 on the rear door hinges (see illustration 53.6).
25. Adjust the door by moving it to the right or left.
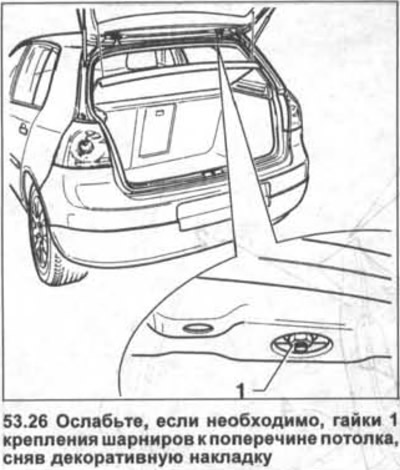
26. Loosen, if necessary, the nuts 1 fastening the hinges to the ceiling cross member by removing the decorative trim (see illustration).
27. Move the door and fit it.
28. Tighten the door hinge bolts to 10 Nm and the hinge nuts to 24 Nm.
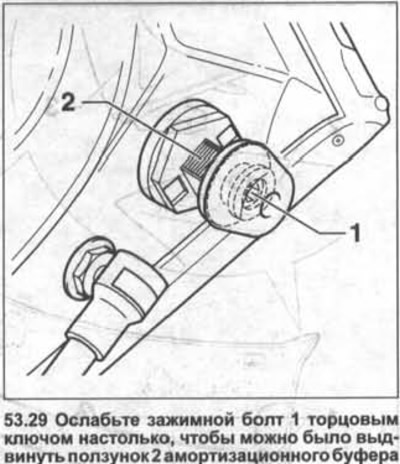
29. Loosen the clamping bolt 1 with a socket wrench so that the slider 2 of the damping buffer can be extended (see illustration).
30. Set the slider so that the distance -a- is 12.5 mm (see illustration).
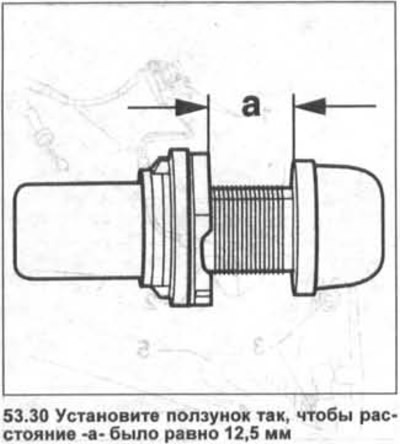
31. Close the tailgate by applying slight pressure on it. This sets the slider to the desired distance.
32. Open the tailgate.
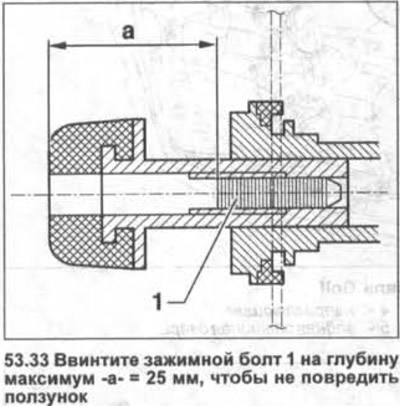
33. Screw in clamping bolt 1 to a maximum depth of -a-=25 mm so as not to damage the slider (see illustration).
34. Close the tailgate, straighten the position of the door lock bracket and tighten the bolts of its fastening with a force of 23 Nm.
35. Make sure the back door closes and opens without problems. Re-adjust the door if necessary.
36. Reinstall the door upholstery.

Visitor comments