Removing

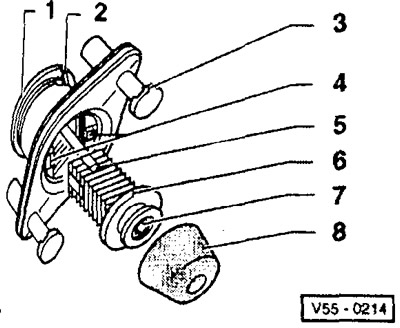
1 - threaded bushing (left hand thread)
2 - remote strut
3 - spacer pin with a slot for dismantling
4 - locking tabs for basic adjustment
5 - recess for the fixing protrusion
6 - fixing washer
7 - locking bolt
8 - rubber buffer
Using a narrow screwdriver, press the spacer pins behind the dismantling slot and pull the adjusting buffer out of the rear wall of the door.
Remove the rubber buffer and unscrew the 3 mm Allen screw to the edge of the fixing washer.

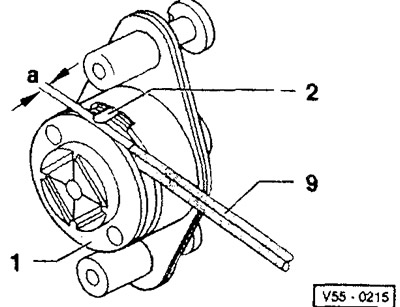
Threaded sleeve -1- (left hand thread) adjust so that the dimension -a- is 3 mm. You can control the value of the -a- dimension, for example, using the -9- key for the internal hexagon.
Note: For new buffers, dimension -a- has already been adjusted to 3 mm. Spacer -2- rests on threaded bushing -1-.

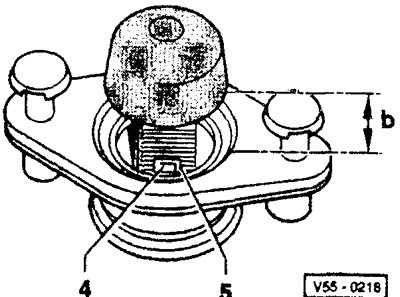
Pull out the locking washer and press again until the locking lugs -4- engage in the recesses -6-. Distance -b- between housing and rubber buffer is 10 mm.
Insert the adjusting buffer and secure with spacer pins.
Close the rear door with a light touch, then open it again.

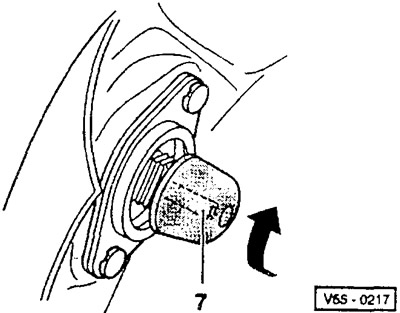
Tighten locking bolt -7- just barely noticeable, i.e. only 1 Nm. To create such a moment, workshops use a torque screwdriver.

Visitor comments