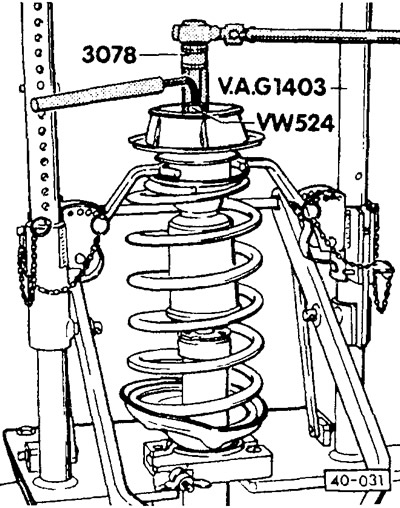
Removing
Remove shock absorber see above.
In order to remove the shock absorber with the rack installed, it is necessary to pre-compress the coil spring. VAG workshops use a special tool for this.
Attention: Never release the shock absorber if the spring is not compressed.
Compress the coiled spring with a suitable tool.
Caution: If the grips of the spring compressor are inserted between the coils of the spring, make sure that the coils of the spring are securely gripped and the grips cannot slip. The spring must be compressed from both sides. The coiled spring is compressed with great force, so use only a serviceable tool. Never tie up the spring with wire. Danger of accident!

Caution: The slotted nut or nut 7 in Figure 40-1231 can only be loosened when the spring is securely compressed.
Loosen the slotted nut using pliers or special tool VW-524 (has a 6-sided head). While doing this, hold the piston rod with an Allen key.
Loosen the coiled spring slowly, remove the individual parts.
Check shock absorber.
Installation
Note: Springs are available with different manufacturing tolerances. Use springs with the same marking (color designation).
The new spring is covered with a protective varnish against corrosion. Before installing the spring, inspect it for damage to the lacquer layer, if necessary, restore the lacquer coating.
Assemble shock absorber strut per drawing 40-851 or 40-1231.
Compress the spring with a suitable tool and place it on the shock absorber strut. Make sure that the end of the spring is in contact with the guide plate.
Up to 9/93: Tighten the slotted nut to 40 Nm. This requires the special tool VW-524 in conjunction with the tool VW-3078 or HAZET 2593-22. When tightening, hold the piston rod with a wrench and an external hexagon, eg HAZET 2110-7. From 10/93: Tighten nut 7 to 60 Nm.
Release the spring slowly.
Install the shock absorber see below.

Visitor comments