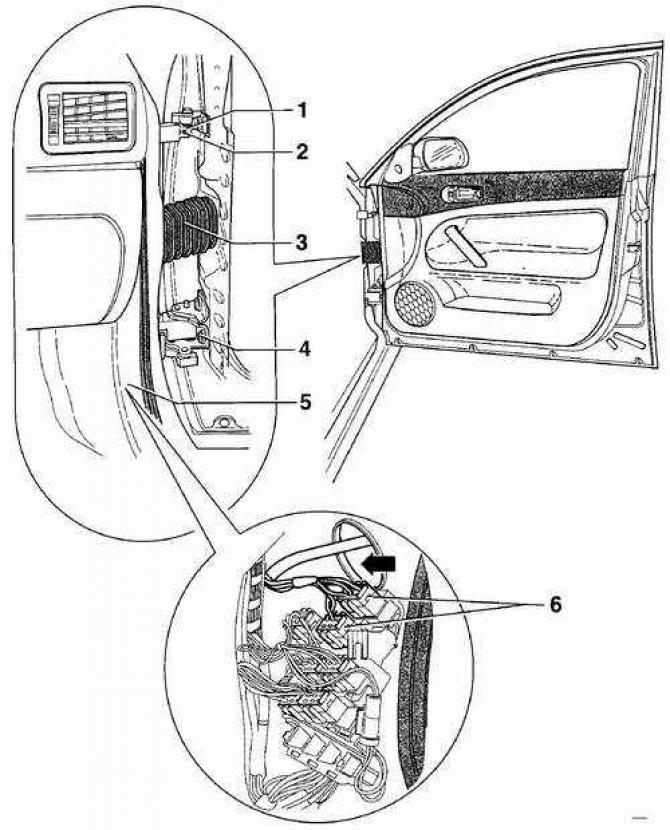
Fastening elements of the front door

- 1 - cap,
- 2 - a bolt of the top hinge of a door,
- 3 - protective cover,
- 4 - a bolt of the bottom hinge of a door,
- 5 - lower side trim of the front door pillar,
- 6 - electrical connectors
Removing
1. Remove the lower trim of the front door pillar (5).
2. Disconnect electrical connectors (6) on the front door pillar.
3. Disconnect the protective cover from the door pillar (3).
4. through the hole (arrow) (see fig. Fastening elements of the front door) remove the electrical connectors from the front door pillar.
5. Remove the cap on the top hinge of the door (1) and unscrew the bolt (2) fixing the upper hinge of the door.
6. unscrew the bolt (4) bottom door hinge. At installation it is necessary to use a new bolt of the lower fastening of the hinge of a door.
7. Moving the door up, remove it from the hinges.
Installation
1. Install the door on hinges from above.
2. Screw in a new lower hinge bolt and tighten it to 20 Nm, then tighten it by 90°.
3. Screw in the bolt securing the upper door hinge and tighten it to 25 Nm. Install the cap.
4. Pass the electrical wires through the hole in the front door pillar and connect the electrical connectors.
5. Attach the protective cover of the wires to the front door pillar.
6. Install the front door pillar bottom interior trim.

Visitor comments