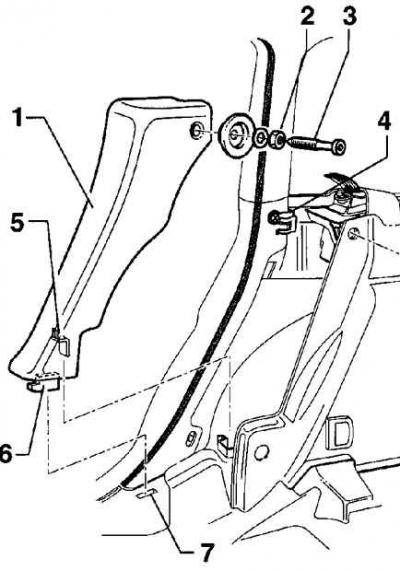
Elements of the interior trim of the rear door opening

- 1 - decorative overlay,
- 2 - nut,
- 3 - screw with fuse,
- 4 - clamp,
- 5 - latch,
- 6 - latch protrusion,
- 7 - threshold pad
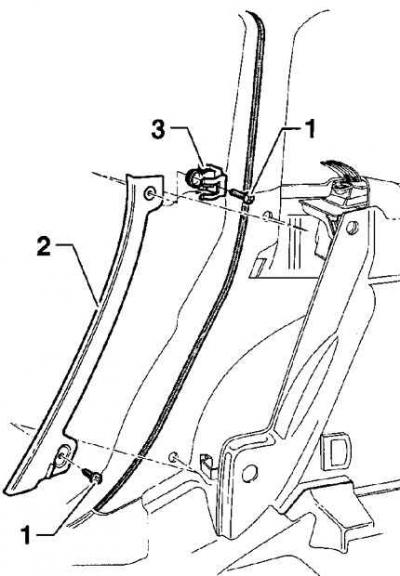
Elements of fastening of an upholstery of a rack

- 1 - screw,
- 2 - upholstery,
- 3 - clamp
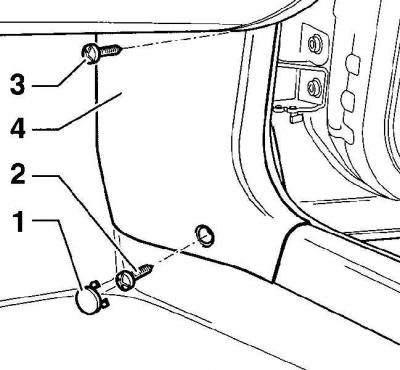
Elements of fastening of finishing of the lower part of the A-pillar

- 1 - plug,
- 2 - screw,
- 3 - screw,
- 4 - finishing panel
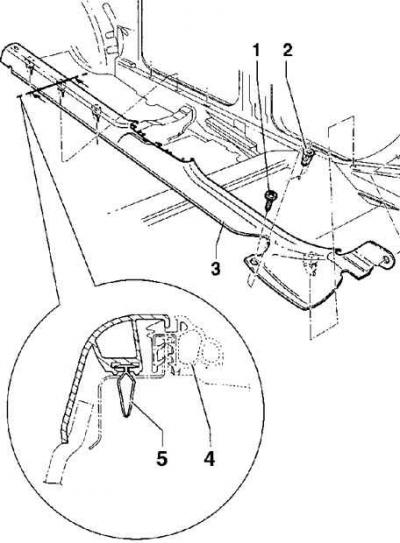
Elements of fastening of an overlay of a threshold

- 1 - screw,
- 2 - plastic nut,
- 3 - threshold pad,
- 4 - door seal,
- 5 - clamp
Removing
1. Release the latches and tilt the rear seatback forward.
2. loosen the nut (2) and unscrew the bolt (3) with fuse, see fig. Elements of the interior trim of the rear door opening.
3. Remove the top of the trim from the clip (4), then release the tab on the bottom (6) from the sill (7) and remove the trim (1) together with a fixer (5).
4. Remove the screws (1), fastening the sheathing (2) rear pillar, see fig. Elements of fastening of an upholstery of a rack.
5. Remove the lower trim of the A-pillar, to do this, remove the plugs that cover the screws, then unscrew the screws and, pulling forward, remove the trim from under the sill trim and remove it from the car, see fig. Elements for fastening the trim of the lower part of the A-pillar.
6. unscrew the screw (1), which secures the rear part of the sill trim, see fig. Elements of fastening of a lining of a threshold.
7. Pull up to release the clips holding the sill trim to the vehicle body and remove the sill trim from the vehicle.
Installation
1. Before installing, check the condition of the sill clips and plastic nuts and replace them if necessary.
2. Installation is made in sequence, return to removal.
3. Check that the door seal is correctly positioned.

Visitor comments