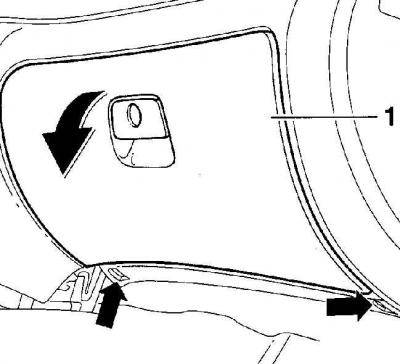
The location of the screws for securing the lower part of the glove box (arrows)

- 1 - glove box cover
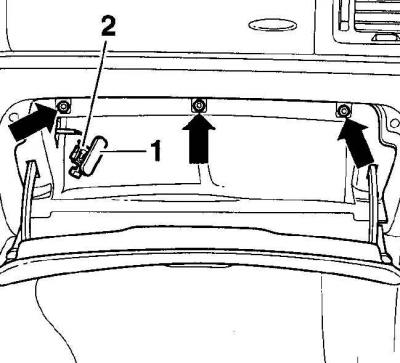
Screw location (arrows) fixing the top of the glove box

- 1 - glove box illumination lamp,
- 2 - electrical connector
Removing
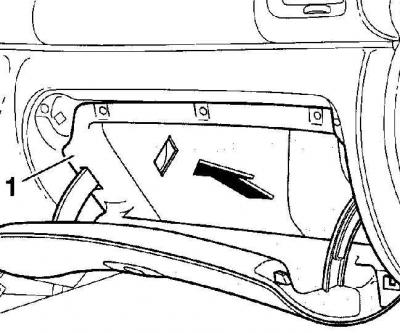
Removing the glove box assembly (1) from the dashboard

1. Unscrew the screws located at the edges at the bottom of the glove box, see fig. The location of the screws for securing the lower part of the glove box (arrows).
2. Open the glove box lid.
3. Unscrew the top screws of fastening of a ware box, see fig. Screw location (arrows) fixing the top of the glove box.
4. Using a screwdriver blade, remove the glove box light from the top side.
5. Disconnect the electrical connector from the glove box light.
6. Take a ware box in gathering from the panel of devices, see fig. Removing the glove box assembly (1) from the instrument panel.
Installation
Installation is made in sequence, return to removal.

Visitor comments