Note. Before replacing the two shift cables, read all instructions regarding this work. Many of the operations are quite complex and difficult to perform for an inexperienced person.

Pic. 248. Details of a cable drive of a gear change: 1 - tip of the gear shift cable; 2 - tip of the gear selection cable; 3 - gear selection cable; 4 - shift cable; 5 - nut, 3 Nm; 6 - bolt, 20 Nm; 7 - holder; 8 - nut, 20 Nm; 9 - rotary lever; 10 - gear selection lever
Replacing shift cables is a labor intensive job. The disassembled cable drive for gear shifting is shown in (pic. 248).
The shift cables cannot be changed individually as they belong to the same assembly. Replace shift cables in the following order:
- disconnect the terminals and remove the battery (Don't forget to have your radio's security code with you);
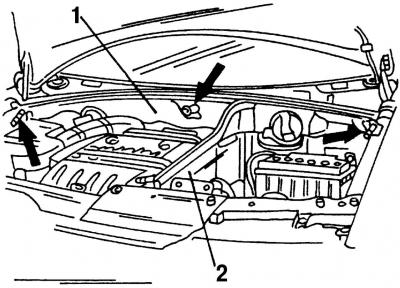
Pic. 234. Places of fastening of the air duct and partition AB (details are shown in the attachment points by arrows): 1 - air duct; 2 - compartment partition AB
- remove air duct 1 (pic. 234) and partition 2 compartments AB;
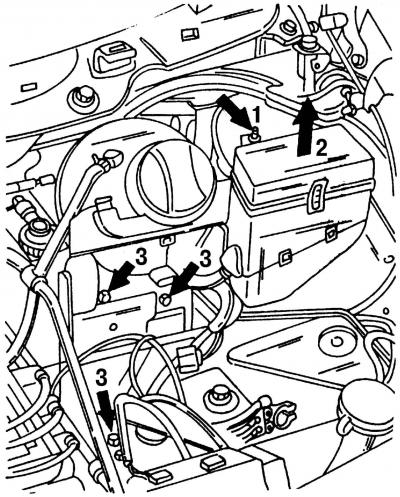
Pic. 235. Places of fastening of casing AB and holder of additional relay block
- if installed, then remove the additional relay box located on the left in the engine compartment of the engine (pic. 235, arrows 1 and 2);
- unscrew the fastening bolts (pic. 235 arrow 3) and remove the battery cover with the expansion tank of the cooling system. Set the tank aside;
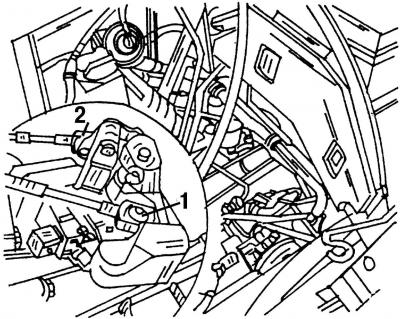
Pic. 239. Attaching cables to gear levers: 1 - gear selection lever; 2 - gear lever
- use a screwdriver to carefully pry one cable away from lever 1 (pic. 239) gear selection and the second cable from the gear shift lever 2;
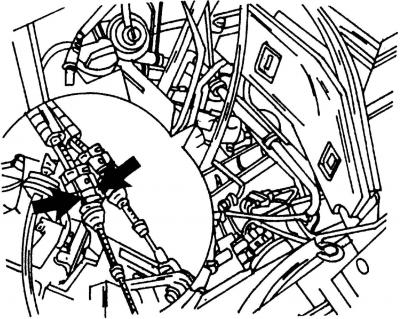
Pic. 240. Fastening of cables of a gear change on a transmission. To remove the cables, squeeze the latches in the direction of the arrows
- squeeze the latches (pic. 240, arrows) and remove both shift cables from the holder on the gearbox;
- Loosen the bolts securing the front exhaust heat shield and slide it into the gap between the exhaust system and the rear heat shield until both shift cables are visible. If there are difficulties, then disconnect the exhaust pipe and the middle part of the exhaust system so that the front heat shield can be displaced;
- remove both front seats together with seat adjustment devices;
- unscrew the gear lever knob and remove it together with the compression spring (the spring will loosen when the handle is turned off);
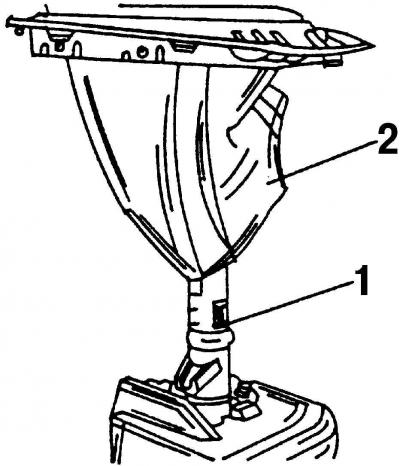
Pic. 249. Removing the mechanism 1 for blocking the reverse gear and protective corrugated cover 2
- unfasten the corrugated cover 2 from the center console (pic. 249) gear lever;
- pull the bellow up and remove it together with mechanism 1 (pic. 249) blocking reverse gear;
- remove the center console cover from the clips and unscrew the center console mounting bolts;
- open the ashtray and pull it out upwards;
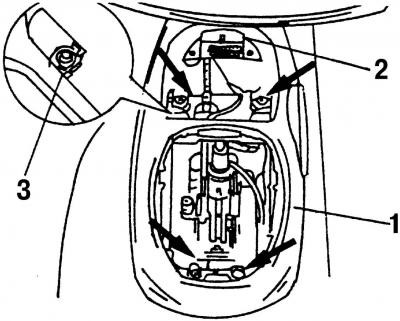
Pic. 250. Removing the center console: 1 - center console; 2 - plug block of the diagnostic system; 3 - ashtray light bulb
- remove bulb 3 (pic. 250) ashtray lighting and disconnect plug 2 of the diagnostic system;
- remove the center console up through the gearshift lever;
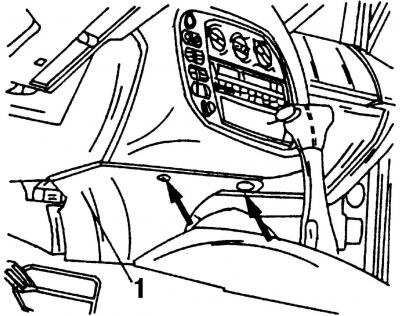
Pic. 251. Removing the middle lining of the instrument panel: 1 - middle lining of the instrument panel
- unscrew the fastening bolts and remove the middle facing 1 (pic. 251) instrument panels;
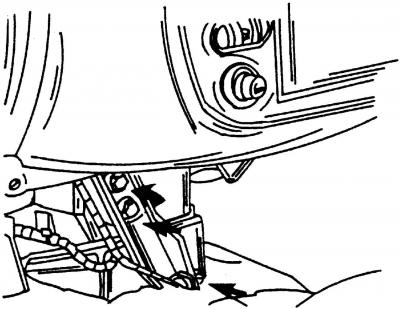
Pic. 252. Removing the gain rack (the locations of the bolts of the reinforcement rack are shown by arrows)
- unscrew the fastening bolts (pic. 252, shown by arrows) and remove the gain rack located under the instrument panel;
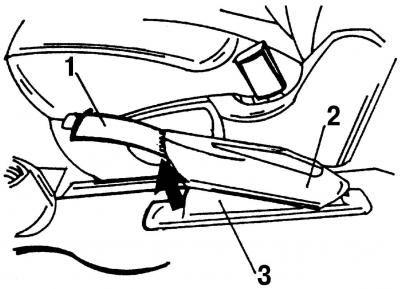
Pic. 253. Removing the lever handle and parking brake boot: 1 - handle; 2 - cover; 3 - casing. The location of the two stoppers is shown by the arrow
- raise the parking brake lever and pull out the two stoppers with a screwdriver (pic. 253). Remove the handle 1 of the parking brake lever in the forward direction and pull off the cover 2 from the lever;
- disconnect the cable attachment flange from the bottom;
- remove the air grille of the heater outlet and the rear heating channel;
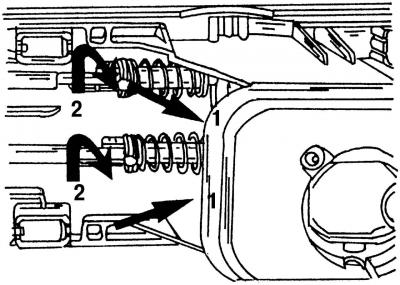
Pic. 254. Disconnecting the cables from the gear levers. Follow the directions shown by arrows 1 and 2
- Disconnect both shift cables from the shift levers. To do this, press the locking mechanisms all the way back (pic. 254 arrow 1) and turn towards (arrow 2) to unlock them;
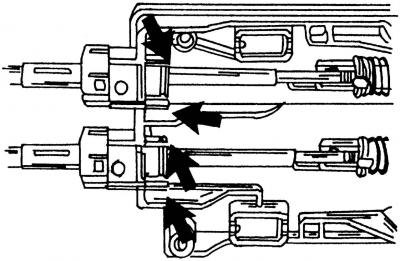
Pic. 255. Extraction of cables from the case of gear levers. Squeeze both tongues shown by the arrows to remove the cables
- squeeze both tongues (pic. 255) and remove both cables from the shift lever housing. Now both shift cables can be pulled out into the passenger compartment.
Install the shift cables in the reverse order of removal, taking into account the following points:
- insert cables individually (in turn) into the openings of the bottom of the body;
- both shift cables go under the bottom of the car to the gearbox;
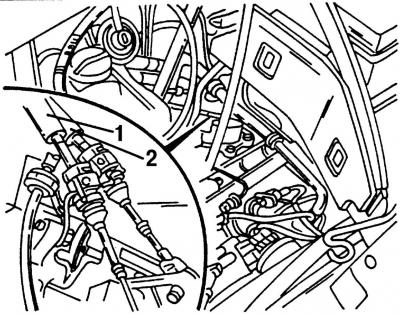
Pic. 256. Installing cables 1 and 2 shifting. Cable 1 gear selection must cross with cable 2 gears
- rope 1 (pic. 256) the gear selector must intersect with the gear shift cable 2. After that, push both cables all the way into the gearbox clamps;
- put on the end of the rope 1 (pic. 239) on the gear selection lever, and cable 2 on the gear lever;
- pull the gear selector outward all the way and press both tabs outward;
- bolts of fastening of a rack of strengthening under the panel of devices tighten the moment of 20 Н·м.

Visitor comments