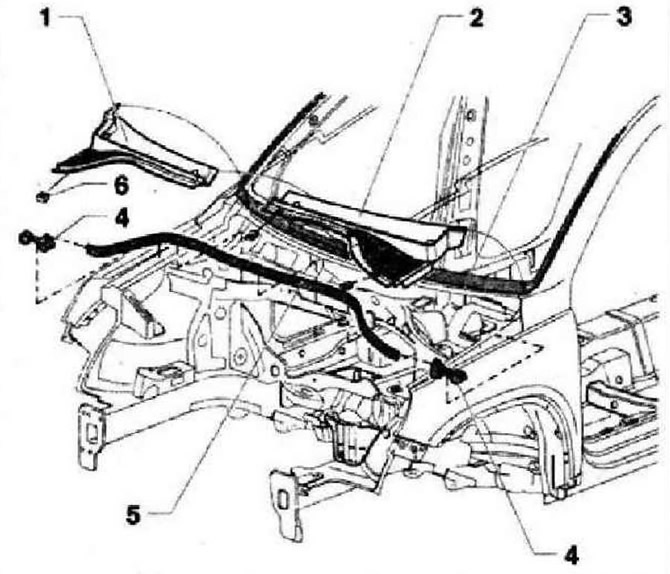
Drainage box cover

- 1 - Right side of the casing of the drain box
- 2 - The left side of the casing of the drainage box
- 3 - Framing profile, an integral part of the windshield
- 4 - Foam piece
- 5 - Seal
- 6 - Mounting bracket, 3 pcs.
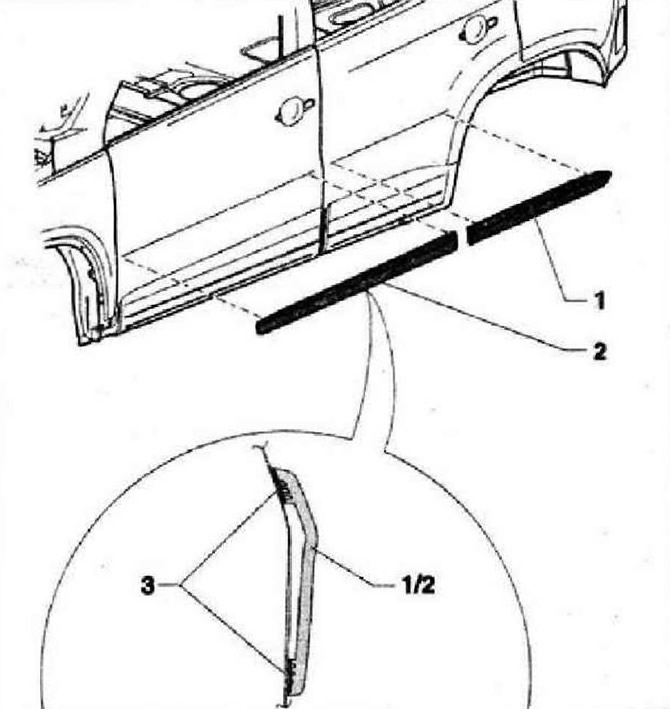
Side moldings
Instruction: Consideration is carried out on the example of the left side, for the right side, work is performed in a similar way.

- 1 - Front door molding made of PP material (polypropylene) /EPPM, self-adhesive
- 2 - Rear door molding made of PP material (polypropylene) /EP0M, self-adhesive
- 3 - Double sided tape
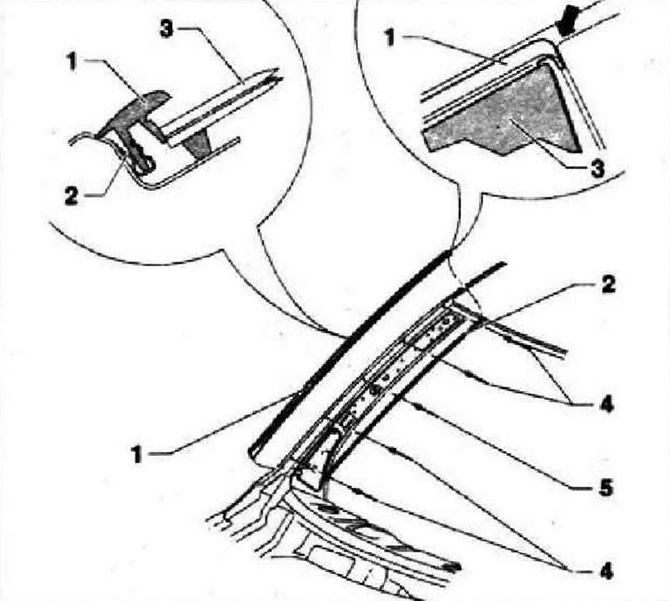
Drain
Instructions: Below is a description of the work on the removal and installation of the left drain. Removal and installation of the right drain is carried out in a similar way.

- 1 - Gutter
- 2 - Mounting strip, insert and remove only with the windshield removed
- 3 - Windshield
- 4 - Blind rivet, 4 pcs.
- 5 - Blind rivet, 1 pc. This rivet should be installed first, as it sets the position of the mounting plate
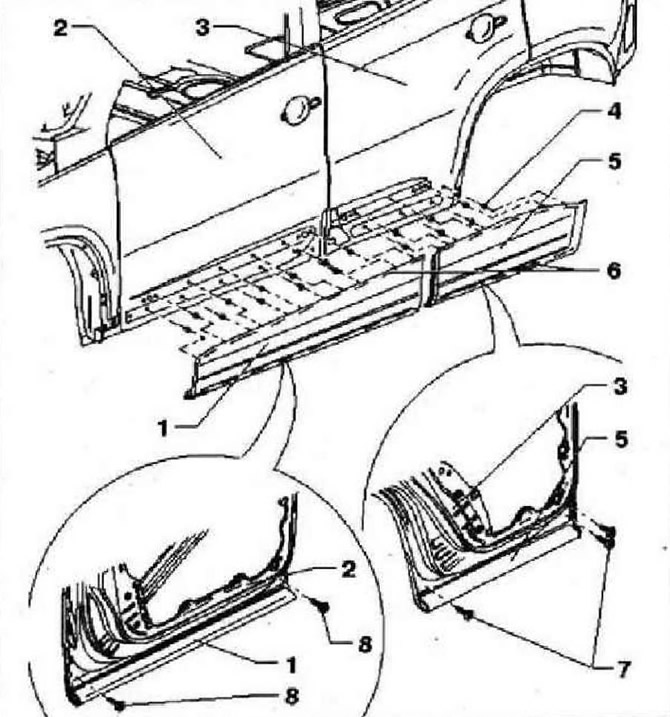
Front and rear door trims
Instructions: Below is a description of the work on removing and installing the left door trims. Removal and installation of overlays of the right doors is made in the same way. The illustrations show the left side of the vehicle. On the right, the work is done in a similar way.

- 1 - Front door trim, self-adhesive
- 2 - Front door
- 3 - Back door
- 4 - Sleeve
- 5 - Rear door trim, self-adhesive
- 6 - Double sided tape
- 7 - Screw, 3 pcs. for rear trim, 2 Nm
- 8 - Screw, 2 pcs. for front trim, 2 Nm

Visitor comments