Long execution
Instruction: The design depends on the installed engine. Take into account the resulting deviations in the removal and installation work. The threads of the new bolts -3- are coated with microcapsules with a fixative, so the bolts must be replaced after each unscrewing.

- 1 - Soundproof cover, -arrow a- indicates the direction of travel. Removal: Unscrew bolts -2,3 and 4-, slide soundproofing cover back until it comes out of its seats in the front support panel. Installation: Insert soundproofing cover in -arrow b- into the seats on the front support panel, tighten bolts -2,3 and 4-
- 2 - Bolt, 1 piece, 2 Nm
- 3 - Bolt, 6 pcs., 2 Nm
- 4 - Bolt. The threads of the new bolts are coated with microcapsules with a fixative, always replace the removed bolts with new ones, 2 pcs., 6 Nm
Short version
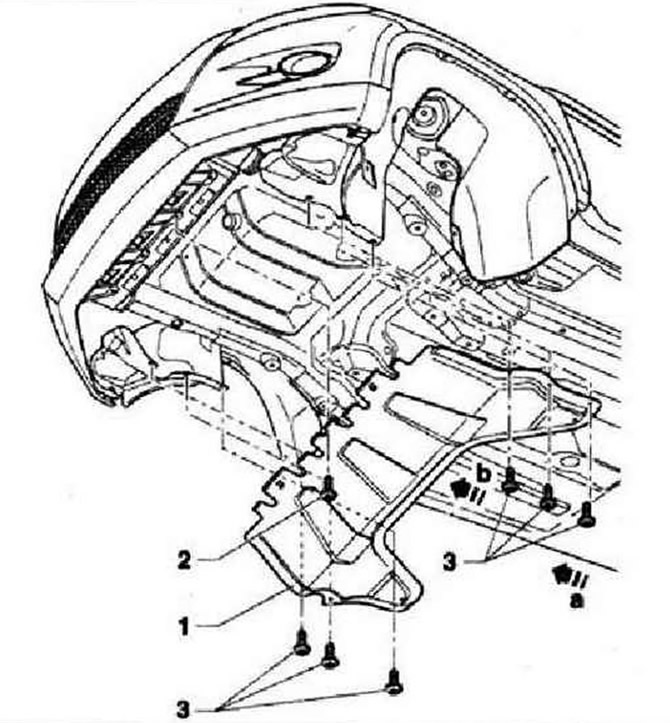
- 1 - Soundproof cover, -arrow a- indicates the direction of travel. Removal: Unscrew bolts -2 and 3-, slide acoustic cover back until it comes out of its seats in the front support panel. Installation: Insert soundproof cover in -arrow b- into slots on front support panel, tighten bolts -2 and 3-
- 2 - Bolt, 1 piece, 2 Nm
- 3 - Bolt, 6 pcs., 2 Nm
Protection
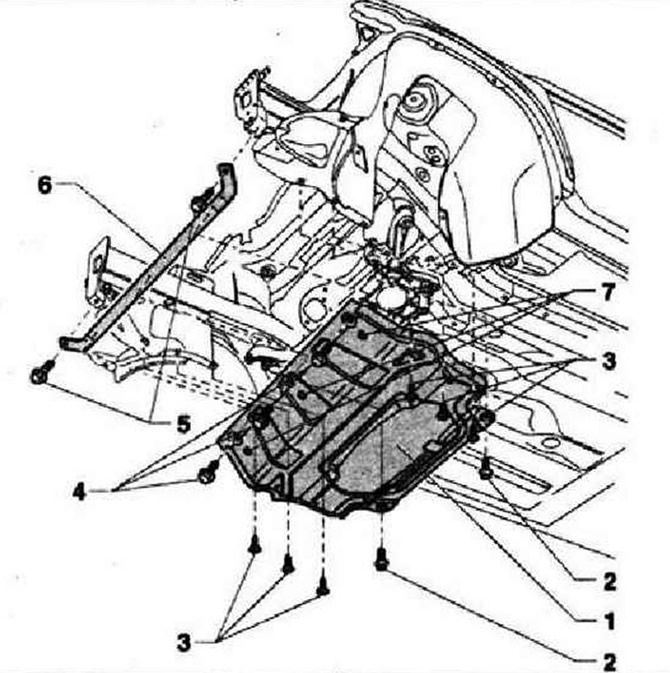
- 1 - Protection
- 2 - Bolt, 2 pcs., 20 Nm
- 3 - Bolt, 6 pcs., 2 Nm
- 4 - Bolt, 3 pcs., 20 Nm
- 5 - Bolt, 2 pcs., 35 Nm
- 6 - Crossbar
- 7 - Spacer insert for mounting the bumper
Bottom lining
Instructions: The illustrations show the right side of the vehicle. The left side is similar to the right.
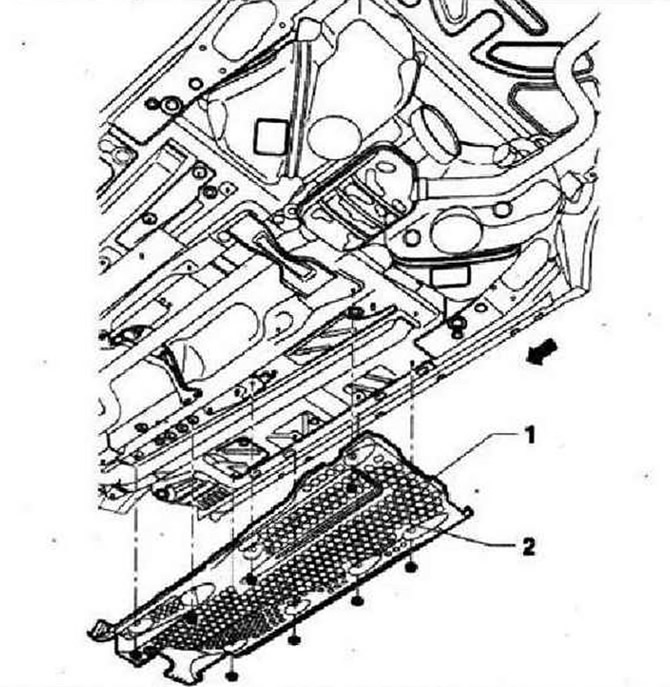
- 1 - Underbody lining, -arrow- indicates direction of travel. Removal: Unscrew nuts -2- from studs. Installation: screw nuts -2- onto studs
- 2 - Nuts, 8 pieces, 2 Nm
Partition of the engine compartment
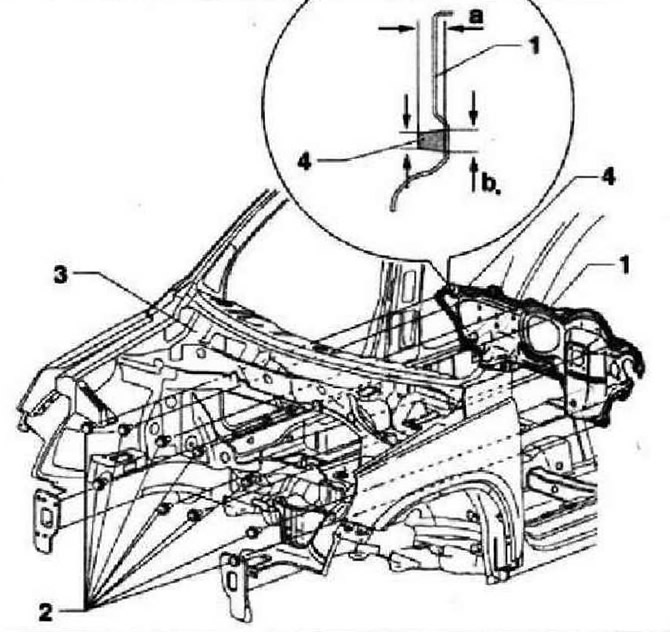
- 1 - Partition of the engine compartment. Removal: Loosen screws -2- and Cut through the sealant layer using a suitable tool
- 2 - Bolt, 10 pieces, 25 Nm
- 3 - Polyurethane adhesive-sealant. Dimensions of the glue roller: - height a- = 10 mm, - width b- = 8 mm
Tunnel crossbar
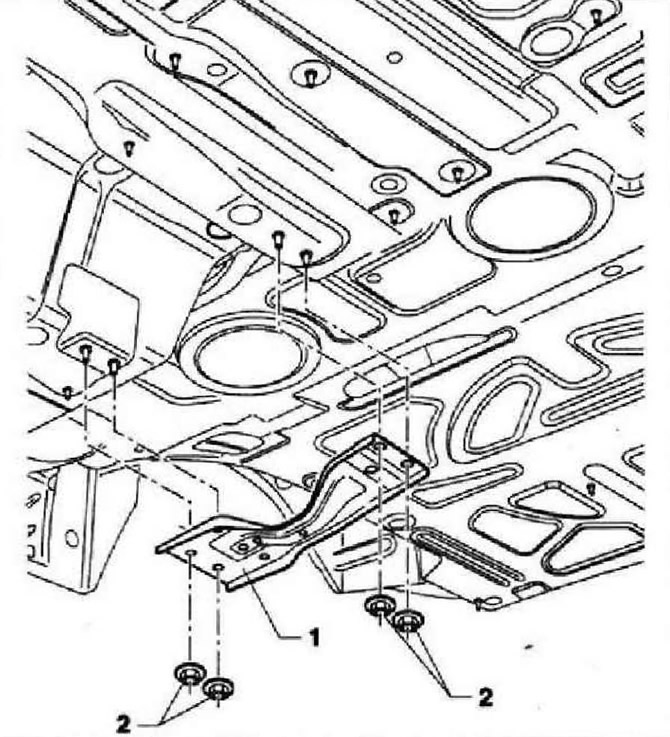
- 1 - Tunnel cross member
- 2 - Nut, 4 pcs., 20 Nm

Visitor comments