Front fender
Instructions: The illustrations show the left side of the vehicle. On the right, the work is done in a similar way.

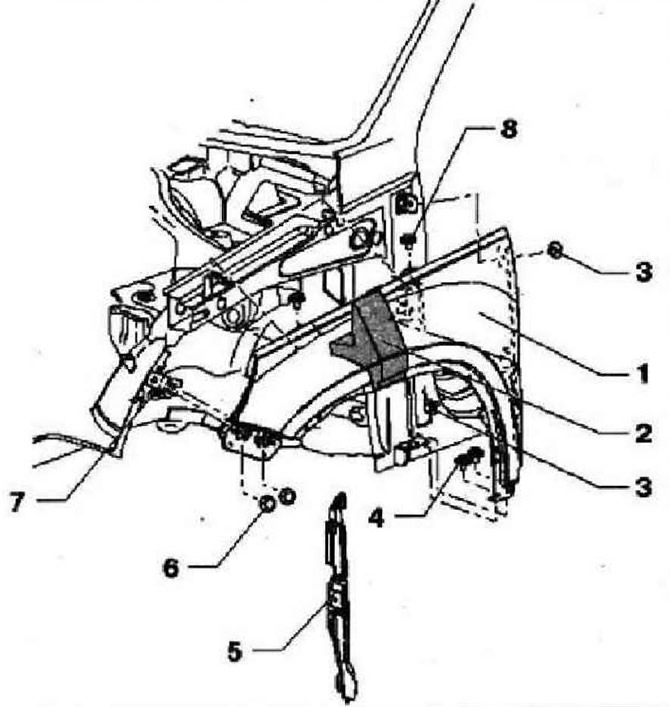
- 1 - Wing
- 2 - Foam element, inserted from above between the spar and the wing
- 3 - Bolt, 2 pcs., to the A-pillar, 7.5 Nm4 - Bolt, 2 pcs., to the threshold, 7.5 Nm
- 5 - Wing plug
- 6 - Bolt, 2 pcs., to the wing support, 7.5 Nm
- 7 - Wing support
- 8 - Bolt, 2 pcs., to the wing mount, 7.5 Nm
Removing
Remove the front bumper cover. Remove fender. Remove wing cap -5-. Remove bolts -3, 4 and 6-. Remove foam element -2- between wing and side member. Release screws -8-. Carefully remove fender -1-.
Installation
Installation is carried out in the reverse order. Bolt tightening torques are shown in the diagram. Check that the joints are even and the gaps are correct.
Removal and installation of a support of a wing

Instruction; Below is an early description of the work to remove and install the left wing support. The right wing support is removed and installed in the same way.
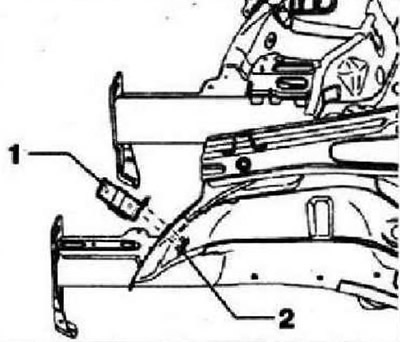
Wing removed. Release screws -2- and remove wing support -1-.
Installation
Install wing support -1-. The position of the wing support is set by adjusting the position of the wing relative to the hood and bumper. Tightening torque for screws -2- 7.5 Nm.
Wing plug

Remove wheel arch liner. Press out the middle retainer of the plug.
Then remove the plug first from the top -arrow b- and then from the bottom -arrow a-.
Installation
Insert the plug first into the bottom socket -arrow a- and then into the top socket -arrow b-. Then, press the center of the plug -arrow c- and insert the middle retainer.

Visitor comments