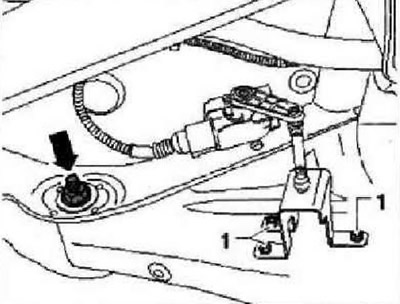
Cars with automatic headlight range control
Remove bolts -1- from lower transverse link.
All
Mark, for example with a felt pen, the position of the eccentric bolt -arrow- in relation to the subframe.

Disconnect and lower the rear of the exhaust system. Remove bolt -arrow B-. Remove the lower transverse link.
Installation
Install the lower control arm to the vehicle and finger-tighten the bolts. The transverse arm mounting bolts can only be tightened after the suspension has been installed in a position corresponding to the size "A"! Screw transverse link to subframe and tighten new nut -arrow- to the correct torque. The eccentric bolt -arrow B- must be positioned in relation to the subframe in accordance with the previously marked marks. Install the rear end of the exhaust system.
Cars with automatic headlight leveling
Screw bolts -1- into lower transverse link.
All
Tighten bolt -arrow- for lower transverse link. Install coil spring. Install the wheel and tighten the wheel bolts. Check wheel alignment.
Tightening torques
| Lower control arm to wheel bearing housing. Use only new bolts and nuts, tighten only in the position corresponding to the curb weight | 90 Nm and tighten by 90° |
| Lower wishbone to subframe - Use only new nuts, tighten only in the position corresponding to the curb weight | 95 Nm |
| Rear left vehicle level sender -G76- to lower transverse link | 5 Nm |

Visitor comments