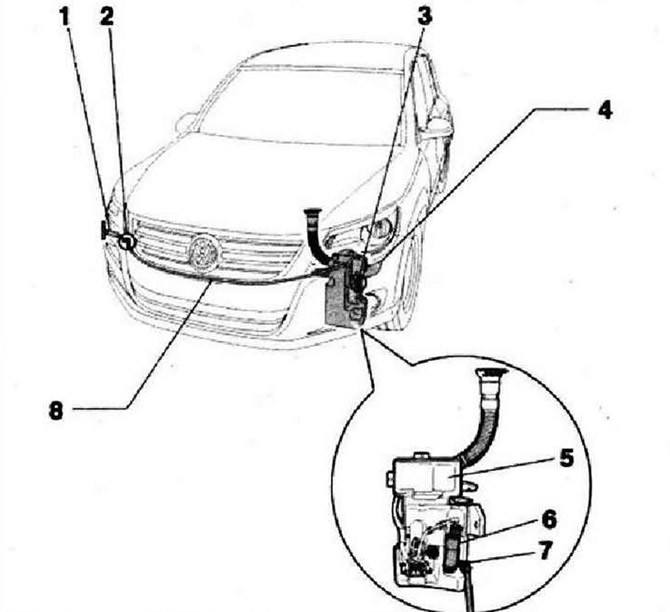
- 1 - Nozzle holder with nozzles on the right
- 2 - Connecting bracket, connection to the lifting cylinder of the right nozzle
- 3 - Tee, connection to the left nozzle lift cylinder, distributes washer fluid to the headlight washer nozzles
- 4 - Nozzle holder with nozzles on the left
- 5 - Reservoir for windshield washer and headlight washer
- 6 - Headlight washer pump -V11 -
- 7 - Connecting corner. Connection to headlight washer pump -V11-
- 8 - Hose
Fault recognition and error indication
The onboard supply control unit -J519- is equipped with a self-diagnosis system that facilitates troubleshooting. For troubleshooting, use the tester -VAS 5051A- in the "Guided Fault Finding".
Removing and installing headlight cleaning pump -V11-
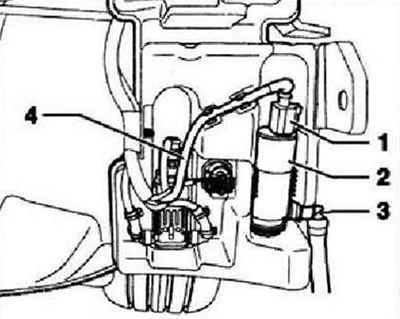
The headlight washer pump -V11- is installed in the windscreen and headlight washer reservoir in the left wheel arch. Switch off the ignition and all electrical consumers, remove the ignition key. Remove the front left wheel housing liner. To unlock, turn retaining clips on hose fitting -3- and remove from headlight cleaning pump -V11- -2-. Collect the liquid pouring out of the washer in a suitable container. Detach wiring harness -4- from both mountings on washer fluid reservoir. Pull headlight cleaning pump -V11- -2- upwards out of reservoir. Unlock and unplug connector -1- and remove headlight washer pump.
Install in reverse order, paying attention to the following. Tighten all screw connections to the prescribed torques. After installation is complete, bleed the headlight cleaning system.
Removal and installation of the nozzle holder
Caution: The nozzle lift cylinder must not be removed by hand. Structurally, when manually removed, the lift cylinder may be pinched during the return stroke. Manual return of the lifting cylinder piston is not allowed and will damage the cylinder. A clamped lifting cylinder becomes operational again if it is activated by the system provided for this. The lifting cylinder can only be withdrawn with water or compressed air.
Switch off the ignition and all electrical consumers, remove the ignition key. Pull out the lift cylinder by actuating the headlight cleaning system and lock it in place. Unclip cap -1- from clips -arrows- on injector holder.
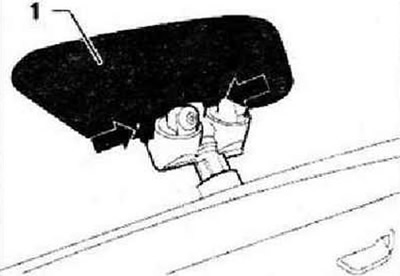
Slightly lift locking tab -arrow- and remove injector holder.
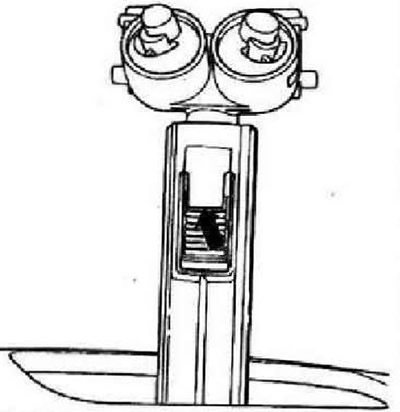
Installation
Instructions: Using the stoppers on the nozzle holder, you can adjust the degree of pressure of the nozzle cap to the bumper cover. If the nozzle holder is not pushed in enough, the cap does not close, excessively pushed in nozzle holders can deform the cap as well as the bumper cover.
Press the nozzle holder into the lift cylinder until it clicks into place. Attach the cover to the nozzle holder and lower the lifting cylinder. Check the correct installation of the cap on the bumper cover. If necessary, adjust the cap setting by moving the nozzle holder to a higher or lower slot on the lift cylinder. After installation is complete, bleed the headlight cleaning system. Check and, if necessary, adjust the headlight cleaning nozzles.
Removal and installation of the lifting cylinder of nozzles
Switch off the ignition and all electrical consumers, remove the ignition key, remove the injector holder. Remove the front bumper cover. Press locking tab -arrow- and pull lifting cylinder -1- back out of holder.
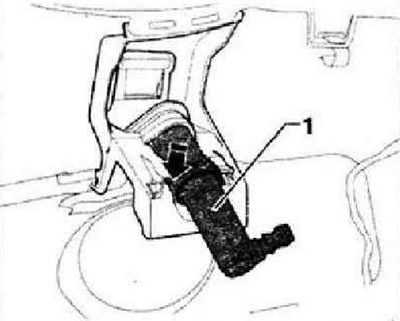
Install in reverse order, paying attention to the following. After installation is complete, bleed the headlight cleaning system.
Bleeding the headlight cleaning system
To ensure that the lift cylinders and nozzles function properly, the headlight washer system must be bled after installation work or at the start of operation. Fill the reservoir of the windshield washer and headlamp cleaning system. Start the engine. Switch main headlights to position "ON". Turn on the headlight cleaning system several times (3-5 pulses of 3 seconds each). If necessary, repeat again until perfect operation of the lift cylinders and nozzles is achieved. As an alternative to the manual method, bleeding can also be carried out using the tester -VAS 5051A- by testing the actuators.

Visitor comments