Divider Grid Extrusion
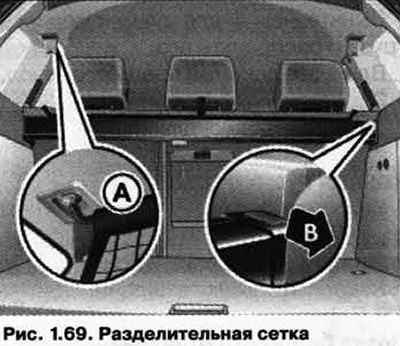
Open cover A on the ceiling (pic. 1.69) (also on the right side), under which there is a nest for attaching a dividing grid.

Pull up the mesh.
Hang the net from the left side A. Make sure that the suspension element is pulled from the top position down.
Hang the net on the right side.
Gently pull on the mesh to make sure it is secure.
Collapsing the divider grid
Unhook the net on both sides. Take the mesh down.
Removing the dividing grid
Collapse the grid.
Slide the lock in the direction of the arrow AB and lift it towards the right side.
Installation of a dividing grid
Insert the grid first on the left side, then on the right side so that it is fixed.
Using the partition net with the rear seat back folded down
Fold both parts of the rear seat back.
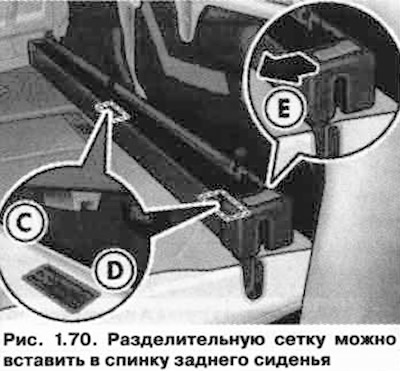
Open the right rear door. Install the separating net in such a way that both locks C (pic. 1.70) entered the fasteners D. The mesh must be securely fixed.

Pull out the grid.
To remove the net, wind it up, slide the clamp E in the direction of the arrow and pull the net to the right side of the car.

Visitor comments