Removing the hub cap
Take the wire puller from the onboard tool.
Hook the wire stripper on the cover (pic. 1.139).
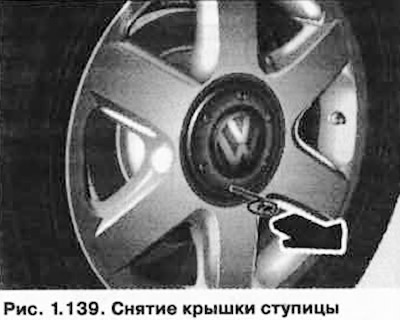
Pull out the cover.
Wire stripper included in on-board tool kit
Removing wheel bolt caps
Insert the end of the wire stripper into the opening of the cap (pic. 1.140).
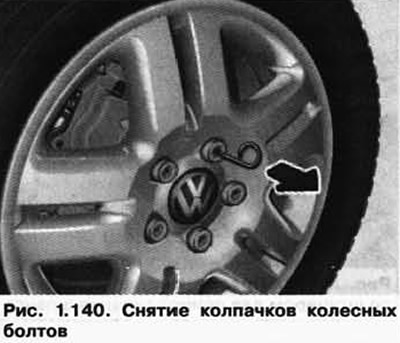
Remove the cap.
The caps protect the wheel bolts and must be put back on after a wheel change.
Loose wheel bolts
Slide the wheel wrench all the way onto the bolt (pic. 1.141).
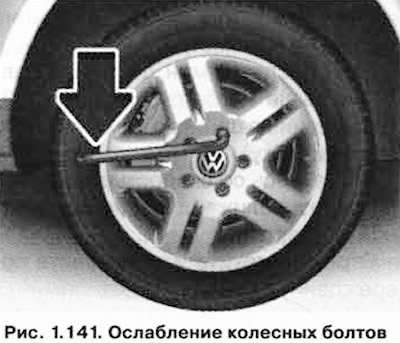
Grasp the end of the wheel wrench and turn the wrench about one turn counterclockwise.
Take the lock bolt adapter from the on-board tool kit 2 (pic. 1.142).
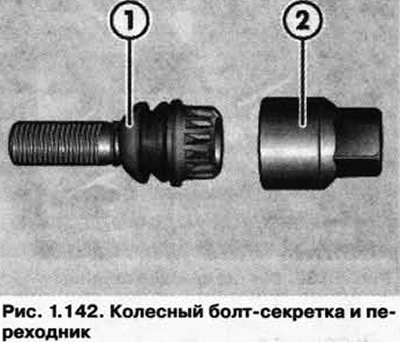
Insert the adapter all the way into the security bolt 1.
Push the wheel wrench onto adapter 2 as far as it will go.
Grasp the end of the wheel wrench and turn the wrench about one turn counterclockwise.
If you cannot loosen the bolt, you can press the end of the key with your foot. At the same time, hold on to the body of the car and maintain balance.
Vehicle lifting
Find a place to install (pic. 1.143) jack which is located near the wheel to be replaced.
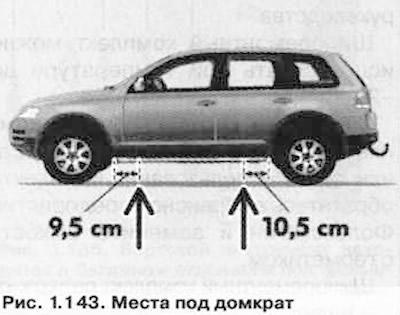
Raise the jack leg just enough so that the jack can still be placed under the vehicle.
Check that the jack leg is fully on the ground.
Straighten the position of the jack and then evenly raise the leg of the jack until it wraps around the vertical rib (pic. 1.144) underneath the car.
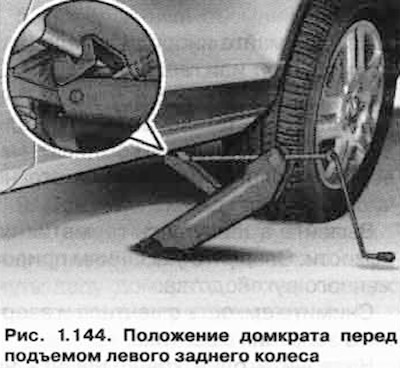
Rotate the jack handle until the wheel is off the ground.
The jack should be installed only under the places intended for this. Near each wheel there is such a place.
Wheel change
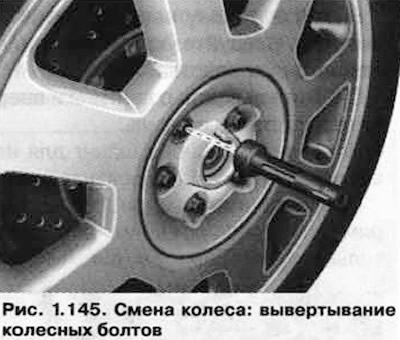
Completely unscrew the upper wheel bolt with the hex screwdriver and place it on a clean surface (pic. 1.145).
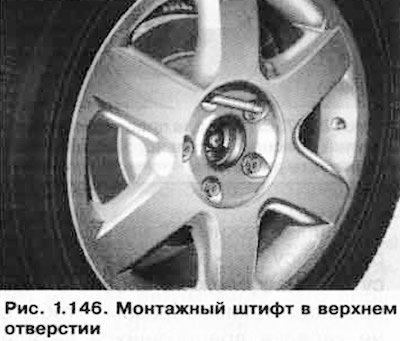
Screw in the mounting pin (pic. 1.146) by hand into the freed threaded hole.
Loosen the rest of the wheel bolts.
Remove the wheel. This keeps the mounting pin in the hole.
Fitting a collapsible spare wheel
Slide the spare wheel onto the hub through the mounting pin. The collapsible spare wheel must be uninflated when installed.
Fit the wheel bolts and screw them in using the hexagon of a screwdriver, slightly tightening the wheel bolts.
Remove the mounting pin and screw in the remaining wheel bolt.
Inflate the spare tire - the air pressure in it is 3.5 bar.
Jack up the car.
Tighten the bolts securely with the wheel wrench. Tighten the bolts not in a circle, but alternately opposite bolts.
Tires with directional tread pattern
Wheels with such tires must be set correctly.
Tires with a directional tread pattern have arrows on the sidewall to indicate the direction in which the tire rotates. The specified direction should be ensured when mounting the wheels on the vehicle. At the same time, all the advantages of such tires in terms of grip, wear, noise and aquaplaning are realized.
If the wheel is set so that it rotates against the arrows, move carefully, as in this case the tire does not work well. This is especially true when driving on wet surfaces, in order to take full advantage of the advantages of tires with a directional tread pattern, at the earliest opportunity, replace the wheel with one on which the tire has the correct position.
After wheel change
Stow the removed wheel in the luggage compartment.
Check the tightness of the wheel bolts with a torque wrench as soon as possible.
Repair or replace the removed wheel as soon as possible.

Visitor comments