Before dismantling, mark the position of all parts in relation to each other. Assembly is carried out in the same position, otherwise an imbalance occurs, which can cause damage to the supports and manifest itself in the form of increased noise.
If rattling sounds occur during movement, it is necessary to unscrew the front propeller shaft from the flange of the front final drive and, having shifted by one mounting hole, screw it on again.
If the rattling sounds persist, the front driveshaft can be moved up to 5 holes.
Removing
For vehicles with automatic transmission, move the selector to the position «N».
Install the brake pedal stop VAG 1869/2.
Raise the vehicle.
Remove a noise isolation under a transmission.
If available, dismantle the bottom protection under the cardan shaft.
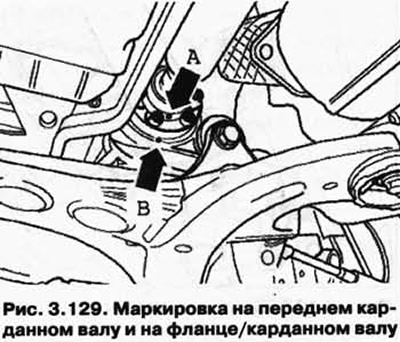
Check on the front propeller shaft and on the flange/propeller shaft of the front final drive for markings (colored dot) (pic. 3.129).

In the absence of this marking, mark the position of the driveshaft flange in relation to the front final drive.
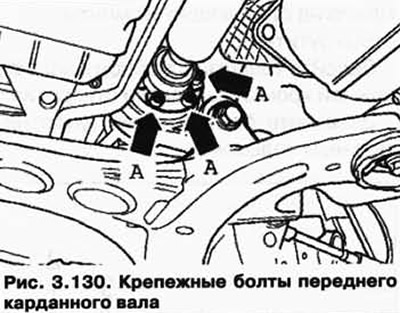
Remove the 3 lower mounting bolts of the front propeller shaft on the front final drive A (pic. 3.130).

Remove the 3 lower front driveshaft mounting bolts on the PTO flange of the transfer case B (pic. 3.131).

Lower the car.
Remove the brake pedal stop VAG 1869/2.
Raise the vehicle.
Turn the front wheels in one direction, and thus turn the front driveshaft half a turn.
Lower the car.
Install the brake pedal stop VAG 1869/2.
Raise the vehicle.
Remove the 3 remaining mounting bolts of the front propeller shaft of the front final drive and transfer case.
Remove the gearbox bracket as follows.
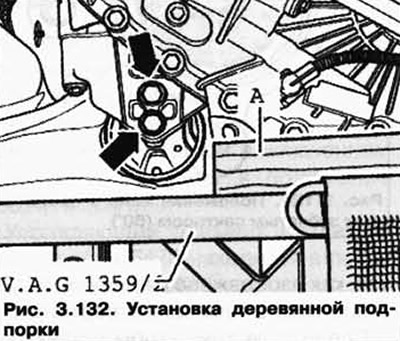
A stand for the engine and gearbox VAG 1383 A with a universal stop 1359/2 and a wooden block A is installed under the transfer case.
Do not loosen bolts (pic. 3.132).

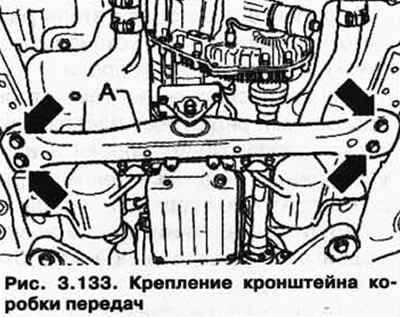
Unscrew the gearbox bracket A from the body (pic. 3.133).

Then unscrew the gearbox bracket from the transfer case console.
Disconnect the front propeller shaft.
If the front driveshaft does not disengage, lower the engine/transmission slightly. At the same time, do not allow the engine to touch the front wall of the body.
Installation
Installation is carried out in the reverse order, paying attention to the following.
Always replace the front driveshaft mounting bolts.
Labels and should be on the same line.
Install the gearbox bracket as follows:
Use new bolts (pic. 3.132).
Screw the gearbox bracket first to the transfer case console with a torque.
Then screw the gearbox bracket A to the body with a tightening torque (pic. 3.133).
Install the front propeller shaft bolts and tighten to torque.
If available, install underbody protection under the driveshaft.
Tightening torques
Console to gearbox bracket (always replace bolts) - 50 Nm + 90°.
Gearbox bracket to body (always replace bolts) - 50 Nm + 90°.
Front propeller shaft to front final drive flange (always replace bolts) - 30 Nm + 90°.
Front propeller shaft to transfer case flange (always replace bolts) - 30 Nm + 90°.

Visitor comments