Before dismantling, mark the position of all parts in relation to each other. Assembly is carried out in the same position, otherwise an imbalance occurs, which can cause damage to the supports and manifest itself in the form of increased noise.
If rattling sounds occur during movement, it is necessary to unscrew the front propeller shaft from the flange of the front final drive and, having shifted by one mounting hole, screw it on again.
If the rattling sounds persist, the rear final drive rear propeller shaft can be moved 5 holes and the transfer case rear propeller shaft 2 holes.
Do not bend the rear propeller shaft, store only with the intermediate bearing mount up.
Removing
For vehicles with automatic transmission, move the selector to the position «N».
Install the brake pedal stop VAG 1869/2.
Raise the vehicle.
Remove the rear part of the exhaust system.
If available, dismantle the bottom protection under the cardan shaft.
Check for markings on the rear driveshaft and on the flange/propshaft of the rear final drive (colored dot) (pic. 3.134).
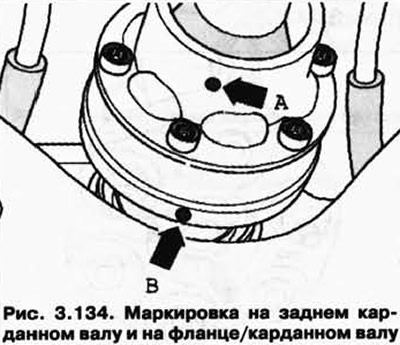
In the absence of this marking - mark the position of the propeller shaft flange in relation to the rear final drive.
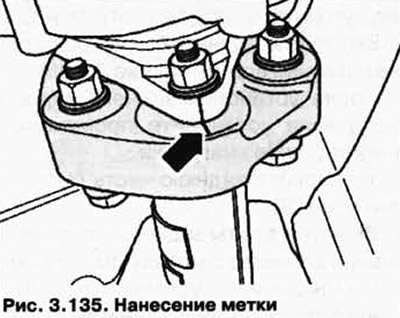
Mark the position of the rear driveshaft in relation to the PTO flange on the transfer case (pic. 3.135).
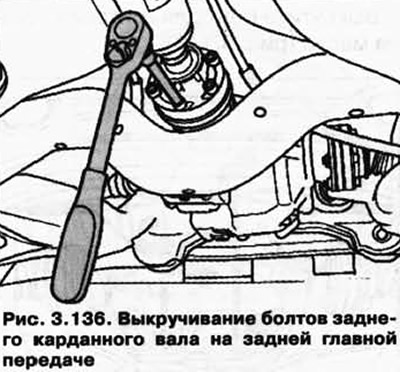
Remove the 3 lower rear driveshaft mounting bolts on the rear final drive (pic. 3.136).
Lower the car.
Remove the brake pedal stop VAG 1869/2.
Raise the vehicle.
Turn the rear wheels in one direction and thus tighten the rear driveshaft 1/2 turn (180°).
Lower the car.
Install the brake pedal stop VAG 1869/2.
Raise the vehicle.
Remove the 3 lower mounting bolts for the rear driveshaft on the rear final drive.
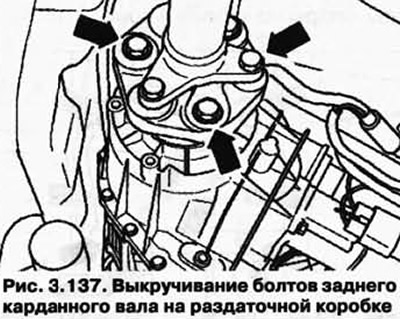
Unscrew the mounting bolts of the rear propeller shaft on the transfer case. To do this, support the nuts with a wrench (pic. 3.137).
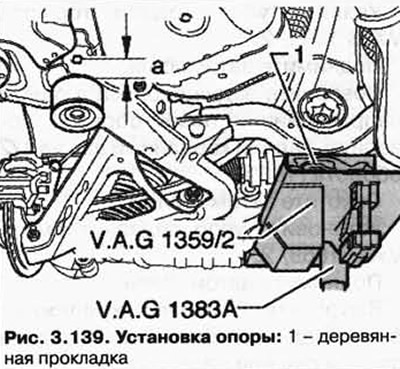
Install the stand for the engine and gearbox VAG 1383 A with a universal stop for the gearbox 1359/2 under the attachment bracket / rear axle.
Place a piece of wood under the attachment bracket fig. N39-10040.
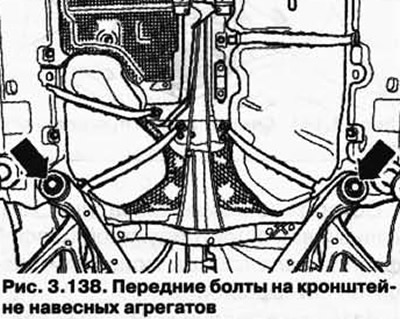
Remove the two front bolts on the attachment bracket (pic. 3.138).
Lower the bracket of mounted units with a stand for the engine and gearbox VAG 1383 A by A = 50 mm (pic. 3.139).
To avoid damage to the rear driveshaft, an assistant is needed to remove it.
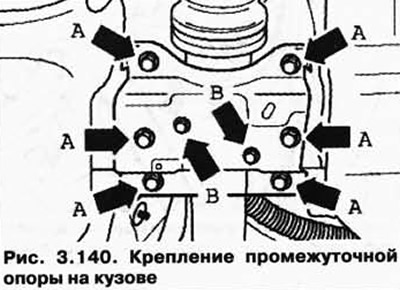
Loosen bolts B securing the intermediate support about 2 turns.
Unscrew the fastening of the intermediate support on the body A (pic. 3.140).
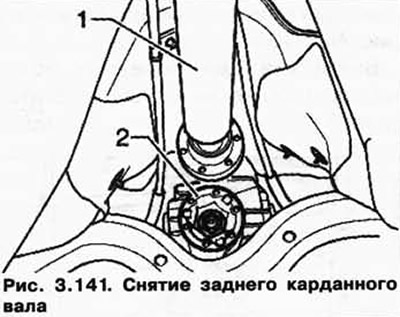
Press the rear driveshaft 1 away from the rear final drive 2 and turn over the final drive flange (pic. 3.141).
Carefully remove the rear driveshaft with the PTO/transfer case flange centering pin.
Remove the rear driveshaft.
Lay the rear driveshaft in position with the intermediate support mounting facing up.
Installation
Installation is carried out in the reverse order, paying attention to the following.
Always replace the rear driveshaft mounting bolts.
Labels and should be on the same line (pic. 3.134).
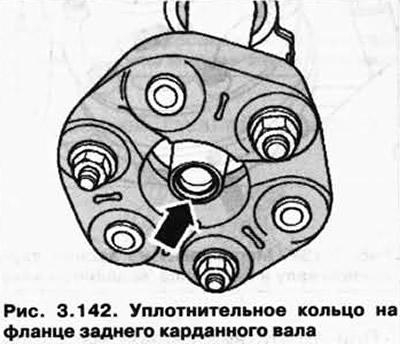
The O-ring on the rear propshaft flange or transfer case must not be damaged during assembly or disassembly (pic. 3.142).
Replace if the rear driveshaft is damaged.
Do not bend the rear propeller shaft, place it vertically on the guide pin.
After unscrewing the flange of the rear propeller shaft, install the intermediate support without load.
Install and tighten attachment bracket bolts (pic. 3.138).
After installing the rear propeller shaft, install the intermediate support without load.
Install the rear end of the exhaust system.
Screw in the bolts of the rear propeller shaft and tighten to a torque.
If available, install underbody protection under the driveshaft.

Visitor comments