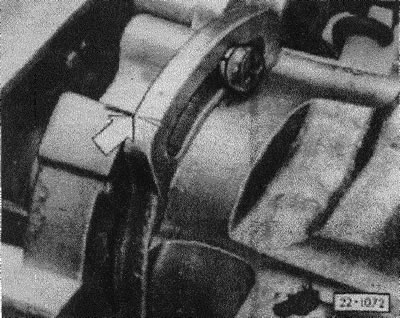
With a properly adjusted system, the marks on the cover and the body of the launcher match.
Removing
Disconnect ground wire from battery.
Disconnect the electrical wires from the automatic engine starter.
Unscrew the 3 screws from the slots, remove the cover of the automatic engine start device.
Installation
When installing, ensure that the heating coil engages with the driver lever.
Put the cover of the automatic engine start device, tighten 3 screws, the marks on the cover and the body must match.
Connect the electrical wires of the automatic engine starter.
Connect ground wire to battery.
If the automatic engine start system turns off too soon (engine stalls while warming up), the cover of the device can be rotated up to about 5 mm (between the label on the cover and the label on the body).
Remove the air filter, unscrew the cover screws of the automatic engine start device, turn the cover. If the device is to remain switched on longer, turn the cover in the direction "zu" (maximum 5 mm from the mark).
Tighten cover screws.
In conclusion, check the automatic engine start system. After warming up, the air damper should be open (be in an upright position).
If the automatic engine start system should switch off earlier, turn the cover in the opposite direction (maximum 5 mm from the mark).
Checking the automatic engine start system
Remove the air filter from the carburetor.
Turn on the ignition.
Check the power supply of the automatic engine start system: disconnect the connector, turn on the control lamp between the connector and the battery dance, the control lamp should be on. If not, replace starter cover. When checking, the coolant temperature must be below 55°C.
Slowly press the gas pedal once, choke (top choke in carburetor) should be closed.
Start the engine.
Depending on the outside temperature, the air damper should open after about 5 minutes. Otherwise, check the integrity of the bimetallic spring and the temperature switch of the automatic engine start system.

Visitor comments