Carefully remove carbon deposits from the piston crown. Do not damage the metal surface of the piston crown. The reason for the poor appearance of the working surface of the piston may be a knocked down installation of the connecting rod.
Damaged pistons and pistons with burnt rings must be replaced together with the cylinders.
Checking the piston diameter
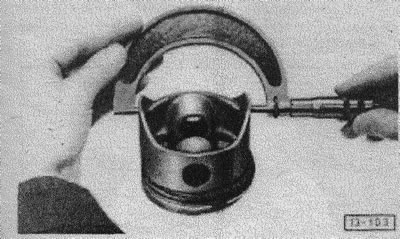
The nominal piston diameter is stamped on the piston crown. The measurement is made with an appropriate micrometer at the lower end of the rod perpendicular to the axis of the piston pin.
The installation gap on the new piston is 0.03-0.06 mm, the wear limit is reached at 0.2 mm.
Piston designation
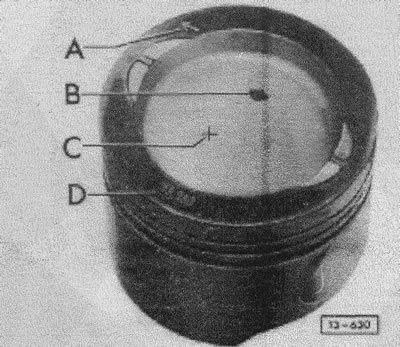
A - arrow (embossed). Install the piston with the arrow pointing towards the flywheel.
B - Marking the size of a pair with a colored dot (blue).
C - Weight group marking (+ or -) embossed or stamped.
- Weight = 448 - 456 g
+ Weight = 457 - 464 g
D - Piston size in mm.
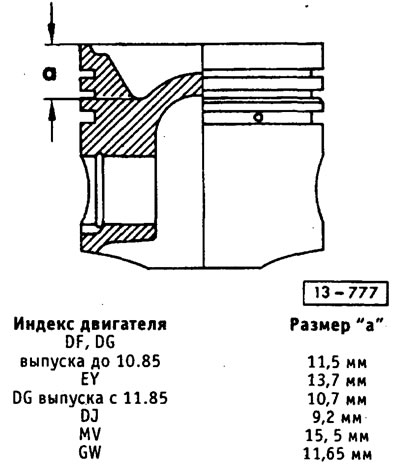
Distinctive features of pistons
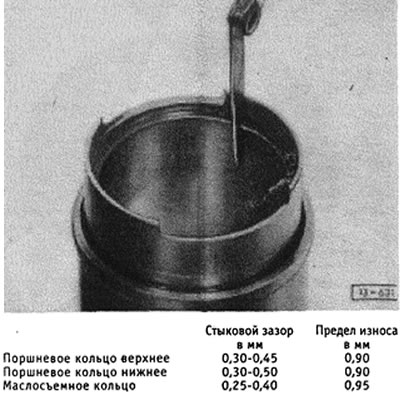
Checking piston rings
In the installed position, the piston ring should not have a butt gap greater than a certain value.
Insert the ring at a right angle into the bottom hole of the corresponding cylinder, about 4-5 mm from the edge of the cylinder.
Check the piston ring gap with a feeler gauge. Replace piston rings with increased clearance.
Checking the piston ring play in height
Insert the piston rings into the piston grooves using special pliers. Measure the ring gaps in height with a feeler gauge.
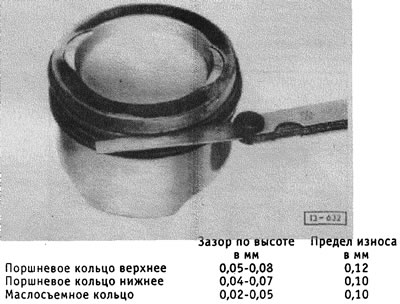
Replace piston rings with increased clearance.

Visitor comments