Removing

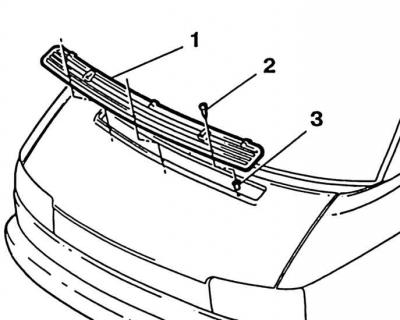
1. Unscrew 3 Phillips screws (2). Carefully lift and remove the grate (1) (3 - expansion nuts).
2. Disconnect the hose from the glass washer water jets, release it from the clips and remove it from the hood cover.

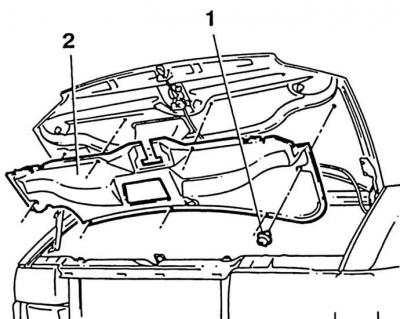
3. Applies to machines with sound absorber on the bonnet: open the bonnet, turn the clip (1) 60°and pull out. Remove noise absorber (2).
4. If equipped, disconnect the engine compartment lamp.

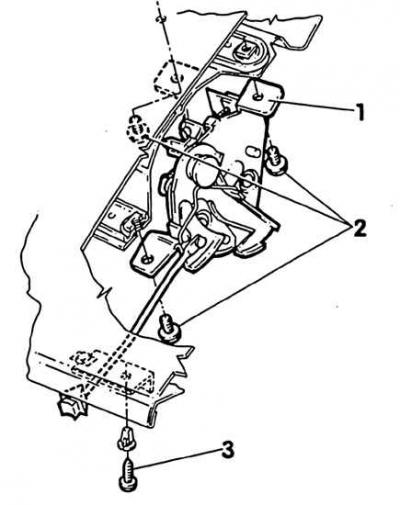
5. Remove cover lock (1). To do this, unscrew the Phillips screw (3) and hex screw (2), remove the lock and disconnect the flexible cable of the lock drive from the cover.
6. If the hood cover is to be installed again, outline the heads of the hinge screws with a felt-tip pen, this will facilitate assembly.
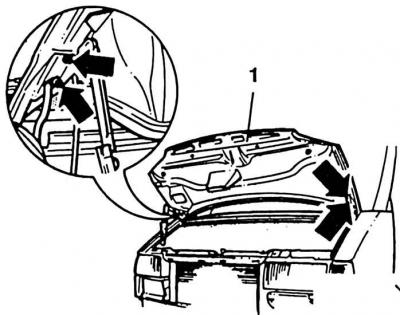
7. Unscrew the hexagon screws of the hinges on the right and left, while supporting the bonnet cover with help. Place a piece of cloth on the right and left first so as not to damage the lacquer.
8. Remove the hood cover.
Installation
1. Screw the hood cover to the hinges without tightening too much.
2. Close the hood cover and check its position.
3. Carefully open the bonnet and tighten the hinge screws.
4. Clamp the flexible cable in the clips and install the lock.
5. Attach the hose to the windshield washer water jets and place it in the hood cover.
6. If equipped, install the engine compartment light and silencer.

7. Install grate (1) and fasten with screws (indicated by arrows).
8. Replace spacer nuts (3) (see fig. higher).

Visitor comments