Removing
1. Remove gearbox (see subsection 4.2).
2. Loosen the screws securing the pressure plate sequentially each time by 1-11/2 turns until the pressure plate loosens.
Attention! If the screws are loosened immediately, the membrane clamps may be damaged.

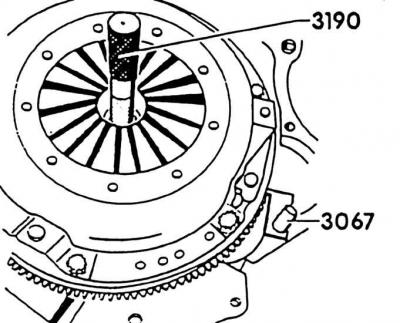
3. To prevent the flywheel from turning while loosening the screws, jam the flywheel with tool VW3067, a screwdriver or a spike.
4. Then unscrew the screws completely.
5. Remove the clutch pressure and driven discs.
Attention! Do not let go or drop both discs when removing, otherwise the installation may cause difficulties due to jamming of the discs.
6. Remove release bearing from guide sleeve.
Attention! Only wipe the bearing, do not wash it.
7. Wipe the flywheel with a rag soaked in gasoline.
Examination
1. Check the pressure plate for burning and furrows.

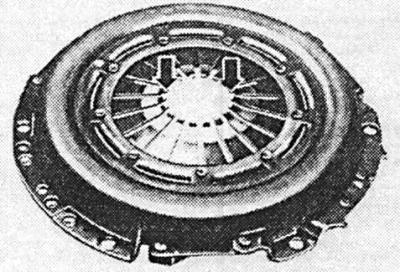
2. Check diaphragm springs for breaks (arrows). Wear equal to half the thickness of the membrane is allowed.

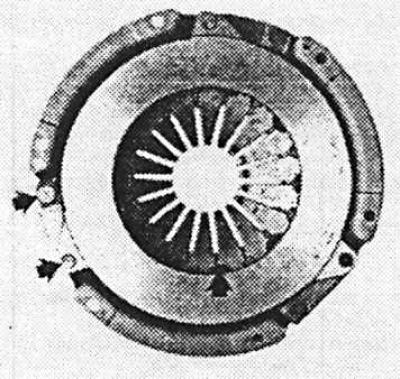
3. Check the connection of the springs between the cover and the pressure plate for cracks and the reliability of the rivet connections (arrows). Replace clutches with damaged or loose riveted joints.

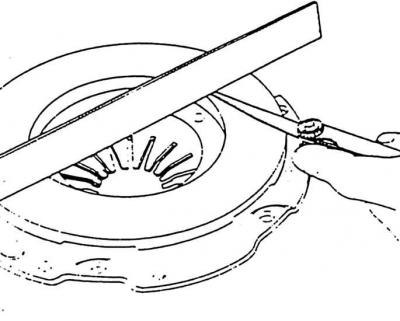
4. Check the contact surface of the pressure plate for cracks, burn marks and wear. Pressure plates bent inward up to 0.2 mm can be installed again. Checking is done with a ruler and a petal probe.
5. Check the flywheel for burn marks and grooves.
6. Oily, greasy or mechanically damaged clutch discs must be replaced.
7. Check the driven disk for sufficient thickness of the friction linings and the absence of grooves.
8. In the factory, the driven disk can be tested for combat. The lateral battle of the driven disk should not exceed 0.8 mm (measured at a distance of 2.5 mm from the outer edge).
Attention! This check is necessary when an old driven disc is installed, in which the clutch did not disengage well enough. If necessary, the driven disk can be carefully straightened.
9. Check the release bearing by hand. To do this, slightly compress the bearing and twist. The bearing must rotate easily, otherwise it must be replaced.
10. When installed, a defective bearing makes noise when the clutch pedal is depressed. In this case, replace the bearing.
Installation
Attention! If new parts are to be installed, it is necessary to check in the spare parts catalog that the pressure plate and driven plate correspond to the engine code and engine number in which they will be installed.
1. Before installing a new pressure plate, be sure to remove all conservation grease from the sliding surface of the release bearing without residue. In other places, the grease must not be removed in any case, as this will significantly reduce the life of the clutch.
2. Check the reliability of fastening of the guide pins, flywheel.
3. Install the clutch disc and pressure plate to the flywheel. Install the pressure plate on the appropriate guide pins. The driven disc must be centered with a suitable tenon (e.g. HAZET) or the old transmission drive shaft.
Attention! The splines of the hub are nickel-plated, so do not lubricate them.
4. Clean the drive shaft from corrosion, and the hub splines of the old driven disk, and lubricate the splines of the drive shaft only with a thin layer of MoS2 grease. In VW workshops, G 000 100 is used for this purpose. Then move the driven disk on the drive shaft back and forth until it runs freely. Excess grease must be removed.
5. When installing the driven plate, make sure that the spring separator points towards the pressure plate.
6. Screw in the screws securing the pressure plate and sequentially, each time by 1–1.5 turns, finally tighten the disc. Tightening torque: 20 Nm. The pressure plate must not be tilted, as this may damage the guide pins and centering holes.
Attention! The pressure plate must be fully seated on the flywheel. Only then install the mounting screws. Under no circumstances tighten the pressure plate with screws, otherwise the centering holes of the pressure plate and the centering pins of the flywheel will be damaged.
7. Then remove the center pin.
8. Install gearbox (see subsection 4.2).

Visitor comments